The (Super)Powers of MicroGreens

It’s garden season and nothing is cooler than finally seeing those little shoots start to emerge from the soil. But did you know that these tiny plants are like nutritional powerhouses in miniature form?

The (Super)Powers of Microgreens

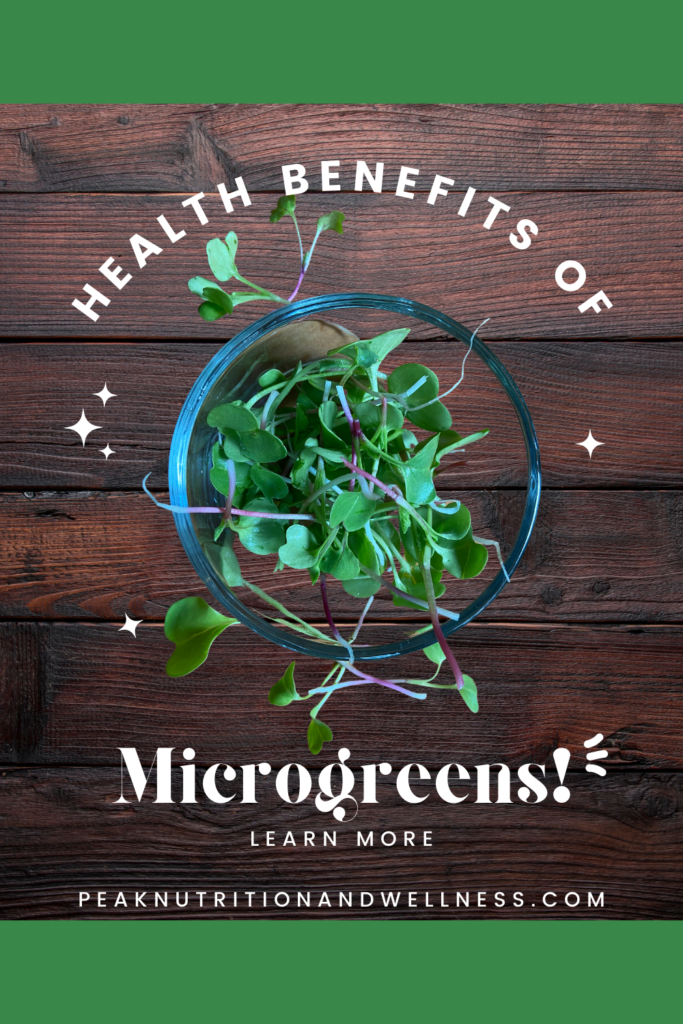
What are Microgreens?

Microgreens are immature plants harvested around 1 to 2 weeks after germination. They are usually 1-2 inches long and include the stem and leaves. 

Are Microgreens and Sprouts the Same Thing?

No! While both are little nutritional powerhouses, microgreens are grown in soil (or a growing pad) and the stem and leaves are eaten. The seed is not consumed. Sprouts are grown in water and the stem and seed are consumed.

Types of Microgreens

These are just a few of the variety of microgreens:

  • Radish
  • Broccoli
  • Basil
  • Peashoots
  • Beets

Health Benefits of Microgreens

Bursting with vitamins, minerals, and enzymes, microgreens offer a range of health benefits. In fact, they can contain up to 40 times the nutrients of the full grown plant!(1) Let’s take a closer look at what microgreens bring to the plate:

  • Nutrient-Rich: Radish microgreens are packed with essential nutrients like vitamins A, C, and E and minerals including zinc, iron, and magnesium. (1) These gems support energy production, immune function, bone health, and more, helping you reclaim that pep in your step! 💥
  • Digestive Support: Are you dealing with bloating, IBS, or heartburn? Adding microgreens to your meal could help your digestion run more smoothly. They contain enzymes that aid digestion and enhance nutrient absorption and are high in fiber. This fiber is a prebiotic, providing a source of food for the good bacteria in your gut. Imagine that? Relief through REAL FOOD! (2)
  • Inflammation Tamer: Joint pains got you down? Microgreens are rich in antioxidants that help combat inflammation in the body. By including them in your meals, you’re helping support overall joint health.(3) 🕺🌱

How to Incorporate Microgreens into Your Meals

Now that we’ve got the sciency stuff out of the way, let’s look at how to get more of these little delights into our diets!

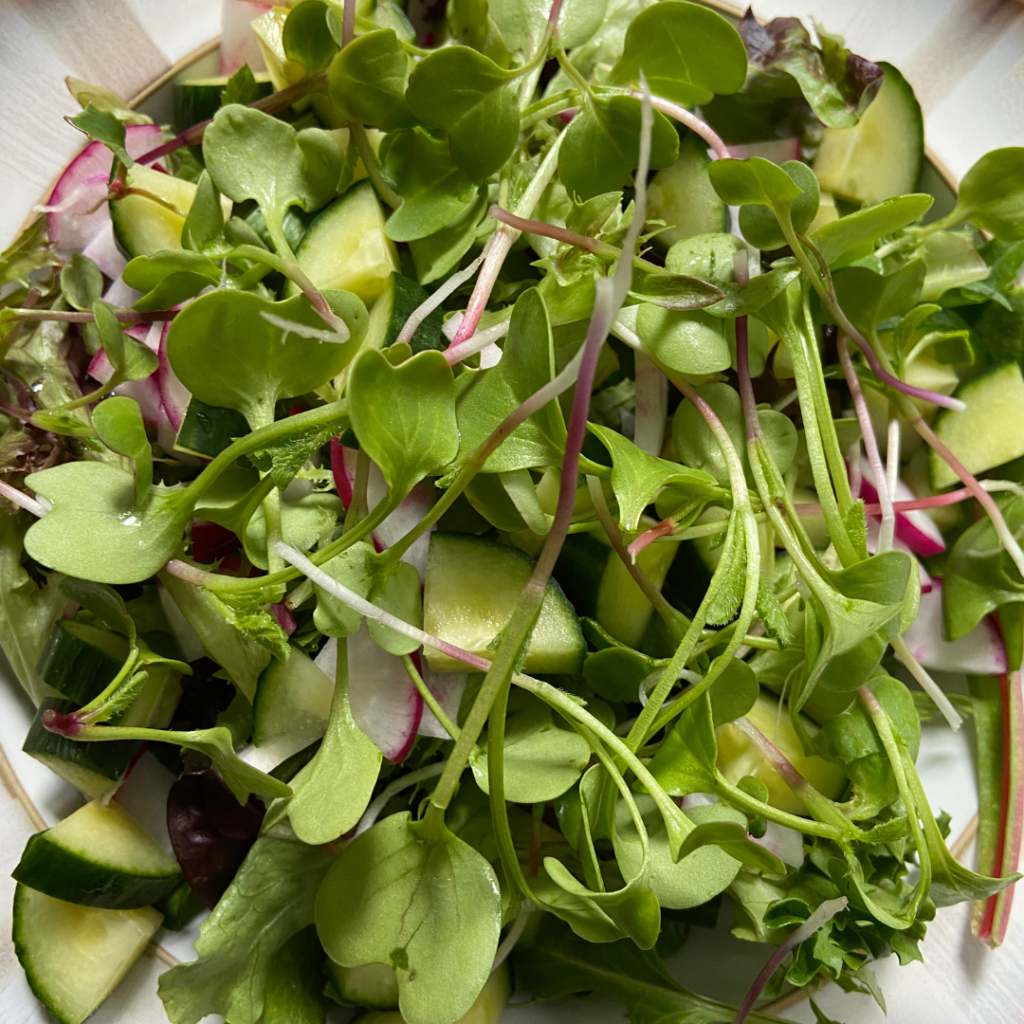
  • Salads: Upgrade your greens game by adding a generous handful of microgreens to your favorite salads.Their crisp texture, fresh flavor will be a welcome addition! 🥗🌱
  • Sandwiches: Elevate your sandwich by layering on some microgreens for an extra crunch and burst of nutrients. They’re a perfect match for avocado, roasted veggies, or your protein of choice. 🥪✨
  • Smoothies: Power pack your morning routine by tossing a handful of microgreens into your smoothie. You’ll be amazed at how well they blend with fruits and greens, giving your smoothie an extra nutritional punch. 🥤💪
  • Stir-Frys: Throw a handful of microgreens into your stir-fry toward the end of cooking. This will preserve their crispiness and add a burst of freshness to your dish. Your stir-fry game just got a major upgrade! 🍲
  • Soups: Top your bowl of soup with microgreens to not only give it that restaurant-like pizzaz, but an extra helping of good-for-you nutrients.🥣

Growing Radish Microgreens

Even if your thumb is far from green, you can grow radishes (and, therefore, radish microgreens)! Radishes are a fast going crop and one of the quickest ways to get homegrown microgreens into your diet. Within as little as 7 days of planting the seeds, you’ll have adorable little shoots! When they are 1 to 2 inches tall, thin the rows by removing some shoots, leaving about 2 inches between plants. Crowded radishes don’t grow well. You can now add your harvested microgreens to your meal! The remaining shoots will continue to mature into radishes (or, if your goal is to only grow microgreens, you can harvest the lot and start a fresh batch!)

No garden? No worries!

You can easily grow microgreens indoors. Check out THIS article for the How-To.

Incorporating radish microgreens into your diet is a small but powerful step towards nurturing your gut and overall well-being. So, grab a handful of these nutrient-packed greens and let them work their magic!

🌱💚 Unlock Your Body’s Innate Healing Power:

If you’re ready to take charge of your health and make sustainable changes to your diet and lifestyle, I’m here to support you every step of the way. As a functional, nutritional therapy practitioner, I specialize in helping individuals like you find relief from symptoms that have been ruling your life. Contact me HERE.

Sources:

  1. Zhenlei Xiao, Gene E. Lester, Yaguang Luo, and Qin Wang. (2012). Assessment of Vitamin and Carotenoid Concentrations of Emerging Food Products: Edible Microgreens. Journal of Agricultural and Food Chemistry, 60 (31), 7644-7651
    DOI: 10.1021/jf300459b
  2. Holscher H. D. (2017). Dietary fiber and prebiotics and the gastrointestinal microbiota. Gut microbes8(2), 172–184. https://doi.org/10.1080/19490976.2017.1290756
  3. M. H. Ahmed et al. (2015). Phenolic Composition, Antioxidant Potential, and in vitro Digestibility of Different Parts of Sprouted Radish (Raphanus sativus L.), Journal of Food Science and Technology, vol. 52, no. 12, pp. 7855–7863.

Pumpkin Spice Latte (gluten free, dairy free, refined sugar free)

Pumpkin Spice Latte" data-pin-description"A healthier version of everyone's fall favorite! Gluten Free, Dairy Free and Refined Sugar Free #pumpkinspice #latte #glutenfree #dairyfree #homemade #refinedsugarfree #cashew #spices #realfood #healthyswaps #peaknutritionandwellness #nutrition #functionalnutrition

Happy Fall! I love the beginning of the autumn months, with the chilly mornings and lovely warm afternoons. By September, I’m usually ready to put the grill aside in favor of some slow braised stews or comforting soups.

For many, the arrival of fall means just one thing…PUMPKIN SPICE SEASON!

Pumpkin spice seems to dominate everything nowadays…from lattes to candles to snack mixes (just walk into a Trader Joe’s in fall and take a gander at their pumpkin spice offerings!)

But the OG, the latte, is what we are here for! If you’ve been avoiding those Pumpkin Spice Lattes from your favorite barista…well, first of all, good for you! 👏👏👏

At 39g of sugar in just a Tall PSL, you are definitely doing yourself a favor! (That’s roughly 10 teaspoonsful of sugar in that little cup!)

Although the sugar gives the ol’ PSL a bad rap, the spices that make up the warming pumpkin spice blend are pretty darn good for us! Check out the benefits below!

Luckily, we can still keep a little spice in our life and avoid the sugar shock by recreating a healthier version of our favorite fall beverage at home. For my healthier PSL, I use maple syrup (which yes, is still sugar, but it is unrefined. This means it still contains other nutrients). It’s also really easy to adjust the quantity, so we can enjoy a little sweetness without the sugar crash.

I also use Cashew Butter (specifically, I use addJoi’s Cashew Base) which gives the creaminess. I have no affiliation with them, I just really like their products, as they have no additives! Many dairy free milk products contain thickeners or emulsifiers which irritate the gut, affect gut health by increasing intestinal permeability and/or contribute to an overgrowth of the intestinal bacteria. I encourage you to check addJoi out!

You can choose to sub in your favorite dairy free milk alternative, but may have to adjust the strength of the coffee to get the right mix, as the extra liquid will water down the latte a bit. If you enjoy a weaker cup, it might work great for you!

Are you like me and prefer your latte iced? I think my love of iced coffee comes from my pharmacist days where I would sip from the same cold cup of coffee all shift long! To make it frosty, simply blend and pour into a glass over ice!

Let me know what you think! Enjoy! 🍂

Pumpkin Spice Latte

A healthier alternative to the Fall favorite!
Prep Time 5 minutes
Total Time 5 minutes
Course Drinks
Servings 1

Ingredients
  

  • 1 cup strongly brewed coffee
  • 1 tbsp organic cashew base (I use the one from addJoi)(https://addjoi.com) can substitute cashew butter
  • 1 tbsp pumpkin puree
  • 1-3 tsp maple syrup
  • 1/4 tsp pumpkin spice blend (see notes for recipe)

Instructions
 

  • Add all ingredients to a blender. Whir it up until frothy and enjoy!
    Note: Start with 1 tsp of maple syrup, you can add more if desired or omit if you prefer a sugar free version.
  • Pour into mug and top with an extra sprinkle of Pumpkin Spice Blend

Notes

 
You can try substituting other nut butters, but I find cashew is the creamiest (less grainy) and works the best.
 
Pumpkin Spice Blend
  • 1 tsp cinnamon
  • 1/4 tsp ground ginger
  • 1/4 tsp ground nutmeg
  • 1/8th tsp ground clove


Keyword dairy free, gluten free, healthy fats, refined sugar free

The Monday Mention – Put Your Heart In Your Mouth by Dr. Natasha Campbell-McBride

The Monday Mention: Put Your Heart in Your Mouth by Dr. Natasha Campbell-McBride

In her book Put Your Heart in Your Mouth, Dr. Natasha Campbell-McBride delves into the true cause of heart disease and many other degenerative diseases. By exploring the many processes our bodies use to heal and repair themselves, she shows us that the true culprits behind the modern-day heart disease epidemic are not, as we have so often been told, cholesterol and saturated fat. In fact, these wrongly vilified substances are vital parts of the body’s healing process. The true villain in this story is inflammation or, to be more precise, chronic inflammation resulting from our modern lifestyles. High stress, diets of processed and refined food, as well as toxins in our environment, home, on our bodies and in our foods, all lead to damage in our blood vessels.

Dr. Campbell-McBride devotes a section of the book to explaining how necessary cholesterol is to our health. She explains that, along with saturated fats, it has received the brunt of the blame for coronary artery disease simply because they are present in the plaques seen in atherosclerosis. Once one understands that cholesterol and saturated fat are essential in the formation of strong cellular walls and necessary in the repair of injured tissue, we begin to see how inflammation is at the core of the problem. The author explains that chronic, unrelenting inflammation means that the repair of the tissue must also be occurring constantly. This constant repair is what leads to accumulation of larger and larger plaques. The bigger the plaque becomes, the more unstable and liable to rupture it is. Another interesting fact the author relays regarding these plaques is that, of the fats contained in them, the majority is not the “evil” saturated fats most doctors blame. It is the unsaturated fats, like those found in the vegetable and cooking oils most used today, that are the predominant fats present in the core of atherosclerotic plaques.

The Monday Mention: Put Your Heart in Your Mouth by Dr. Natasha Campbell-McBride
Want to understand the root cause of heart disease? Start here!

The book doesn’t just describe how we come to develop heart disease but lays out ways that we can avoid it. Incorporating whole, organic, properly prepared foods into our diets and avoiding the processed foods and sugar which encourage inflammation either directly or by causing nutrient deficiencies that impair our inflammatory response. As the “Gut Health Girl”, I was glad to see a portion of the book dedicated to the importance of digestive health and the microbiome in supporting cardiovascular well-being. Hippocrates famously said that “All disease begins in the gut” and this includes cardiovascular disease! A healthy gut has beneficial bacteria that produce and release several vitamins crucial to protecting the cardiovascular system. When we are deficient in Vitamin K2, we see greater deposition of calcium in the arteries (arteriosclerosis) and more inflammation. Homocysteine, an amino acid that is very caustic to the lining of our blood vessels, is held at bay by adequate amounts of folate, Vitamin B6 and Vitamin B12. All of these are manufactured by our gut flora.

In reading through this book, I noticed how strongly Dr. Campbell-McBride’s writing correlates with what I discuss with my Nutritional Therapy clients. From the idea that the modern Western diet is at the core of most disease to how stress management, attitude and movement all play a role in supporting health, we are on the same mission to inform and empower people to optimize their health. I found the book enjoyable to read and thought the author explained some complex subjects in a way that is very easy to understand. I think many of you would appreciate both how approachable she has made the information and that she provides a nice selection of recipes as a starting point to eating healthier and preventing heart disease.

If you’d like to learn more about Nutritional Therapy and how it can support your body’s innate ability to heal, fill out the Contact Me form on my website!

Rating 5 Peaks
PEAK rating – 5/5 peaks!!

SAFER SUNCARE

Safer Suncare

There are two things that come to mind when I think of summertime, warm days and lovely, lovely sunshine!! I don’t think I truly appreciated the sun until I moved to the Pacific Northwest, where it can be a rare sighting for the majority of the year. Growing up on the Canadian Prairies, it may have been cold for months on end, but the sun shone most days of the year! So now that the days are getting longer and the sun is starting to finally peak out from behind the clouds, my thoughts turn to getting outside as much as possible and enjoying it until “The Big Wet” sets in again!

I’ve never been a sun worshipper. It became clear to me early on, as my friends all turned a sun kissed, golden brown and I went from pale to a painful, lobster red in record time, that sunbathing was not a hobby for me. I don’t remember a lot of talk about sunscreen growing up, although I’m sure we must have used it or I would have been a walking sunburn all summer long. Today, people are much more aware of the damage the sun’s rays can inflict and the use of sunscreen to protect us from these harmful effects is a regular part of most people’s warm weather routine.

When choosing a sunscreen, most people first look at the SPF or sun protection factor (probably followed closely by the all important “what does it smell like” factor). SPF is a measure of how long a sunscreen will protect you from the damaging UVB rays. For protection against both UVB rays and UVA rays, the product must be labelled Broad Spectrum. This ensures that the protection from UVA is on par with the UVB protection. Applying a sunscreen with an SPF of 15, for example, would allow you to stay out in the sun, without burning, 15 times longer than without sunscreen. This, of course, is in IDEAL situations.

In real life, this SPF factor is likely overestimating your protection. People either don’t apply enough sunscreen or don’t reapply it often enough (especially if swimming or sweating). We also tend to stay out in the sun much longer than we should, because we think “Hey, I’m good. I applied sunscreen this morning!” (Guilty as charged).

Both UVA and UVB rays are damaging to the skin

Because they are applied, often quite thickly, to a much larger body surface area than most other personal care products, the safety of the ingredients in the sunscreen we choose needs to be considered. (Really, we should be considering the safety of everything we apply to our skin!) The skin is the largest organ in our bodies and it can, and does, absorb ingredients and allow them to enter our bloodstream.

There are two types of filters used as protectants in sunscreen, chemical filters and mineral filters.

1. Chemical 

Chemical filters are the most commonly used and include oxybenzone, avobenzone, octisalate, octinoxate and homosalate. These agents absorb into the skin, where they then absorb the UV light and convert it to heat, which is released from the body. Because they need to be absorbed, they need to be applied at least 20 minutes prior to sun exposure.

Health concerns surrounding these chemical filters are due to reports that they may mimic or disrupt hormones in our systems. They have also been shown to cause allergic reactions. Because some lotions also contain”penetration enhancers” many of these substances are well absorbed into the body. (1)

A recent study of four commercially available chemical sunscreens found that the amount absorbed into the bloodstream exceeded the threshold established by the FDA for potentially waiving some nonclinical toxicology studies for sunscreens (2). More research into the safety of these compounds is definitely warranted. In fact, the FDA has asked for more data on the safety of these chemicals before they will label them Generally Recommended as Safe. This doesn’t necessarily mean that they are “unsafe”, but there is not enough information to ensure they ARE safe.

2. Mineral

Mineral filter sunscreens use either zinc oxide or titanium oxide. Both are considered safe agents (the only two filters labelled as Generally Recommended as Safe by the FDA) with little, if any, absorption through the skin. The minerals are often pulverized into nanoparticles to make the sunscreen more transparent and nicer to apply. Mineral filters work by physically blocking and reflecting the UV rays, like a mirror. They are effective immediately after application. Concerns associated with mineral sunscreens are mostly associated with aerosol sprays and lip formulations, as the nanoparticles can be inhaled (causing lung irritation) or ingested. These concerns would also apply to aerosol and lip products using chemical filters.

You can also make your own Natural Sun Lotion using the recipe below, provided to me by my friend and essential oils guru, Mary Jo. As it is homemade, you can’t be sure of the SPF provided, so reapply often and remove yourself from the sun at the first sign of pinkness! This lotion includes dōTERRA® Helichrysum Oil, which is super nourishing for the skin. Like with anything else you put on your skin or ingest, you want to be confidant in the purity of it. Many oils on the market are contaminated or full of synthetic chemicals. I highly recommend dōTERRA® oils, both for their superior quality and their responsible sourcing practices. If you want to learn more about dōTERRA® essential oils, or experience them for yourself, visit Mary Jo’s website! https://www.doterra.com/US/en/site/mjbader .

Natural Suncare

Ensuring adequate protection from the sun’s hot summer rays is important, but it is equally important that the products we choose to use aren’t harming us in a different way. Here are some tips for safer sun care so we can all make the most of the warm summer days.

Summer Sun Safety Tips

Sources:

1. https://www.ewg.org/sunscreen/report/the-trouble-with-sunscreen-chemicals/

2. Matta MK, Zusterzeel R, Pilli NR, et al. Effect of Sunscreen Application Under Maximal UseConditions on Plasma Concentration ofSunscreen Active Ingredients: A RandomizedClinical Trial. JAMA. Published online May 06,2019. doi:10.1001/jama.2019.5586

The information contained in this article is for educational and informational purposes only and is not intended as health or medical advice. Always consult a physician or other qualified health provider regarding any questions you may have about a medical condition or health objectives.

Devilishly Good Deviled Eggs

Devilishly Good Deviled Eggs
Jump to Recipe

One of my clearest food memories is of my Mom’s Deviled Eggs. I can still see the yellow Tupperware container with the special “egg holding” insert that she used. I wouldn’t say she made them all that often, but usually when you saw that Tupperware container come out, you knew there was a party or holiday meal about to happen!

Mom’s eggs were DELICIOUS. A little sweet and a little tangy, thanks in part to a “miraculous” mayonnaise style condiment that was pretty popular while I was growing up. It probably STILL IS popular with a lot of folks, but with its high fructose corn syrup, fragile and damaged oil and various thickeners and fillers, it’s not something that’s invited into my grocery cart anymore.

So I knew if I wanted to relive that childhood food memory, I’d have to ditch the processed stuff and create my own version. I think they are just as tasty as the one’s I remember eating growing up. Different, but just as good. Well, maybe ALMOST as good because does anything ever taste as good as what Mom made? It’s that “the secret ingredient is love” thing. Pretty sure.

The funny thing about deviled eggs is that they are one of the few foods that really don’t smell all that great (they ARE kinda stinky), but almost everyone loves when they show up at a get together! I’ve taken them to numerous shindigs (they are a great potluck item for those of us avoiding gluten or dairy). When I arrive, I uncover the deviled beauties while sheepishly mumbling an apology for the odor, only to be cut off with excited exclamations by fellow party goers! “Oooo deviled eggs! I haven’t had those in ages!” “Wow! I love these things! I never make them because they are so much work!”

Truth? They are REALLY easy to make. Yeah, they take a bit more effort than grabbing a veggie tray from the supermarket (which there is nothing wrong with, by the way), but they definitely give the impression you put a lot more work in than you did. That’s never a bad thing.

The hardest part of making deviled eggs is getting hard boiled eggs that you can peel easily. There’s not much worse than trying to peel an egg and ending up with something that looks like the dog chewed on it, full of gouges and holes. I’ve found that the Instant Pot makes perfectly peelable eggs EVERYTIME! Feel free to go old school on the stove top, if that’s your style. I have read that fresh eggs don’t peel as easily as older eggs. I’ve never had an issue with the Instant Pot, but if you are boiling on the stove top, maybe buy your eggs a week or so ahead of time.

Alright – enough chit chat! Let’s get to the good stuff! How to make these wickedly good little things!

First step is to boil (or pressure steam) those eggs. I’m going to run with the Instant Pot instructions here, but I have included stove top directions in the recipe card.

Place your eggs in a single layer on the trivet (rack) of your Instant Pot.

Add 1 cup of cold water to the pot. Place and lock the lid onto the instant pot.

Ensure that the venting dial is set to SEALING and set the timer to 6 minutes under HIGH pressure.

When the timer goes off, immediately turn the venting dial to VENTING, making sure to avoid the high pressure steam that will be released. Once the pressure has lowered enough so that the lid unlocks, you can either remove the eggs to an ice bath or take the lazy person’s way (like me) and use pot holders to lift the stainless steel insert out of the Instant Pot and run cold water over the eggs. Allow the eggs to sit in the ice bath or cool water for about 10 minutes.

This would be a great time to make your mayonnaise. Click HERE to get my quick, easy and healthy Mayonnaise Recipe. You can use a store bought Avocado Oil or Olive Oil Mayo (just make sure to read those labels carefully!), but avoid any with hydrogenated or partially hydrogenated oils. Damaged, unhealthy fats make damaged, unhealthy bodies!!

Now the fun part! Peel those eggs! It is really SO easy with Instant Pot eggs – total game changer.

Once the eggs are peeled, slice each egg in half lengthwise and spoon out the yolks into a separate bowl. Set the whites aside for filling later. (Pro tip from my Mom…cook a couple more eggs than you need and use their yolks in the filling. This gives you a little extra filling to go around. Nobody likes skimpy deviled eggs! You can keep the whites to use in salads etc.)

Mash the yolks up with a fork and then add the mayo, mustard, apple cider vinegar, salt and pepper (if using). The measurements I give in the recipe are to my taste. I’d advise that, instead of dumping everything in, add the ingredients separately (even a bit at a time) mixing well in between and taste as you go. Depending on your own palate, how big your yolks are and even how thick your mayo turned out, you may want to adjust quantities a bit.

Once you’ve got the filling mixed so it’s smooth, fluffy and tasting great, spoon the mixture back into the yolk divots in the whites you set aside. You can get fancy and use a piping bag, but spooning it in with a teaspoon is quicker, easier and you don’t lose a whole bunch of your delicious filling on the sides of the bag.

Once filled, let your creativity flow and garnish those bad boys with whatever floats your boat. Bacon, chives, scallions, dill, jalapeño, smoked salmon, paprika, kimchi(pat it dry first!)… the options are endless.

Chill until serving. Keeps well, covered, in the fridge for 3 to 5 days. Enjoy! Let me know what topping you like on your devilled eggs in the comments!

If you want to find out more about the incredible, edible egg, check out my previous TRILOGY of posts on eggs!

Part 1 – What Do All Those Labels on Egg Cartons Really Mean?

Part 2 – Common Myths and Misconceptions about Eggs

Part 3 – The Nutritional Value of the Humble Egg

Print Recipe
Devilishly Good Deviled Eggs
Perfect for picnics and BBQs, game day feasts or potlucks, these little devils are quick and easy to prepare, free of processed ingredients and full of protein and healthy fats. A true crowd pleaser!
Prep Time 30 minutes
Servings
deviled eggs
Ingredients
Prep Time 30 minutes
Servings
deviled eggs
Ingredients
Instructions
Hard Boiling the Eggs (Instant Pot)
  1. Place the eggs in a single layer on the trivet in your Instant Pot.
  2. Add 1 cup of cold water to bottom of pot and place and lock lid. Make sure that the steam release valve on the lid is set to "SEALING".
  3. Turn the Instant Pot on and set it to cook under High Pressure for 6 minutes.
  4. As soon as the eggs have finished cooking, immediately release the pressure by turning the steam release valve to the "VENTING" position. (WARNING! Pressurized steam is HOT! Keep clear of the valve until pressure has released! You may also want to make sure your instant pot isn't directly under cabinetry so the steam does not damage the wood).
  5. Once the pressure releases to the point that the lid unlocks, carefully remove lid. Use tongs to transfer the eggs from the Instant Pot to an ice bath. Alternatively, you can remove stainless steel insert (using pot holders), place it in sink and run cold water over the eggs. Once cooled (about 10 minutes), you can store them in the fridge for about a week or, peel and use them immediately.
Hard Boiling the Eggs (Stove Top Version)
  1. Place the eggs in the saucepan in single layer and cover with cold water. The water should cover the eggs by at least an inch.
  2. Set burner to medium high heat and bring to a boil.
  3. Once the water reached the boil, cover and remove from heat.
  4. Let stand for 10 minutes.
  5. Drain and cool in an ice bath for approximately 10 minutes. Alternatively, you can place pot in sink and run cold water over the eggs. Once cooled, you can store them in the fridge for about a week or, peel and use them immediately.
Devilled Eggs
  1. Peel eggs and slice them in half lengthwise, dropping the cooked yolks into a small bowl and reserving the cooked whites to fill later.
  2. Once all the eggs are halved and the yolks removed, use a fork to mash up the yolks. Add the mayonnaise, mustard, vinegar, salt and pepper(optional).
  3. At this point, taste your mixture and make any adjustments to suit your preferences.
  4. Spoon mixture into the hollowed out eggs whites and garnish as desired (see suggestions below!).
Recipe Notes

Keep covered and chilled until serving. Keeps 3 to 5 days, covered, in fridge.

Plan to cook 2 more eggs than you need. The extra yolks will ensure you have ample filling and you can save the whites and use them later in a salad (or just eat them as a snack!).

Basic Mayonnaise Recipe Link

GARNISH IDEAS - Let your imagination run wild! The possibilities are endless!

  • Paprika (old school standard) - regular or smoked
  • Bacon
  • Dill
  • Jalapeno
  • Radish
  • Scallion or Chives
  • Kimchi
  • Smoked Salmon