Kale Pesto (Gluten-Free & Dairy Free)

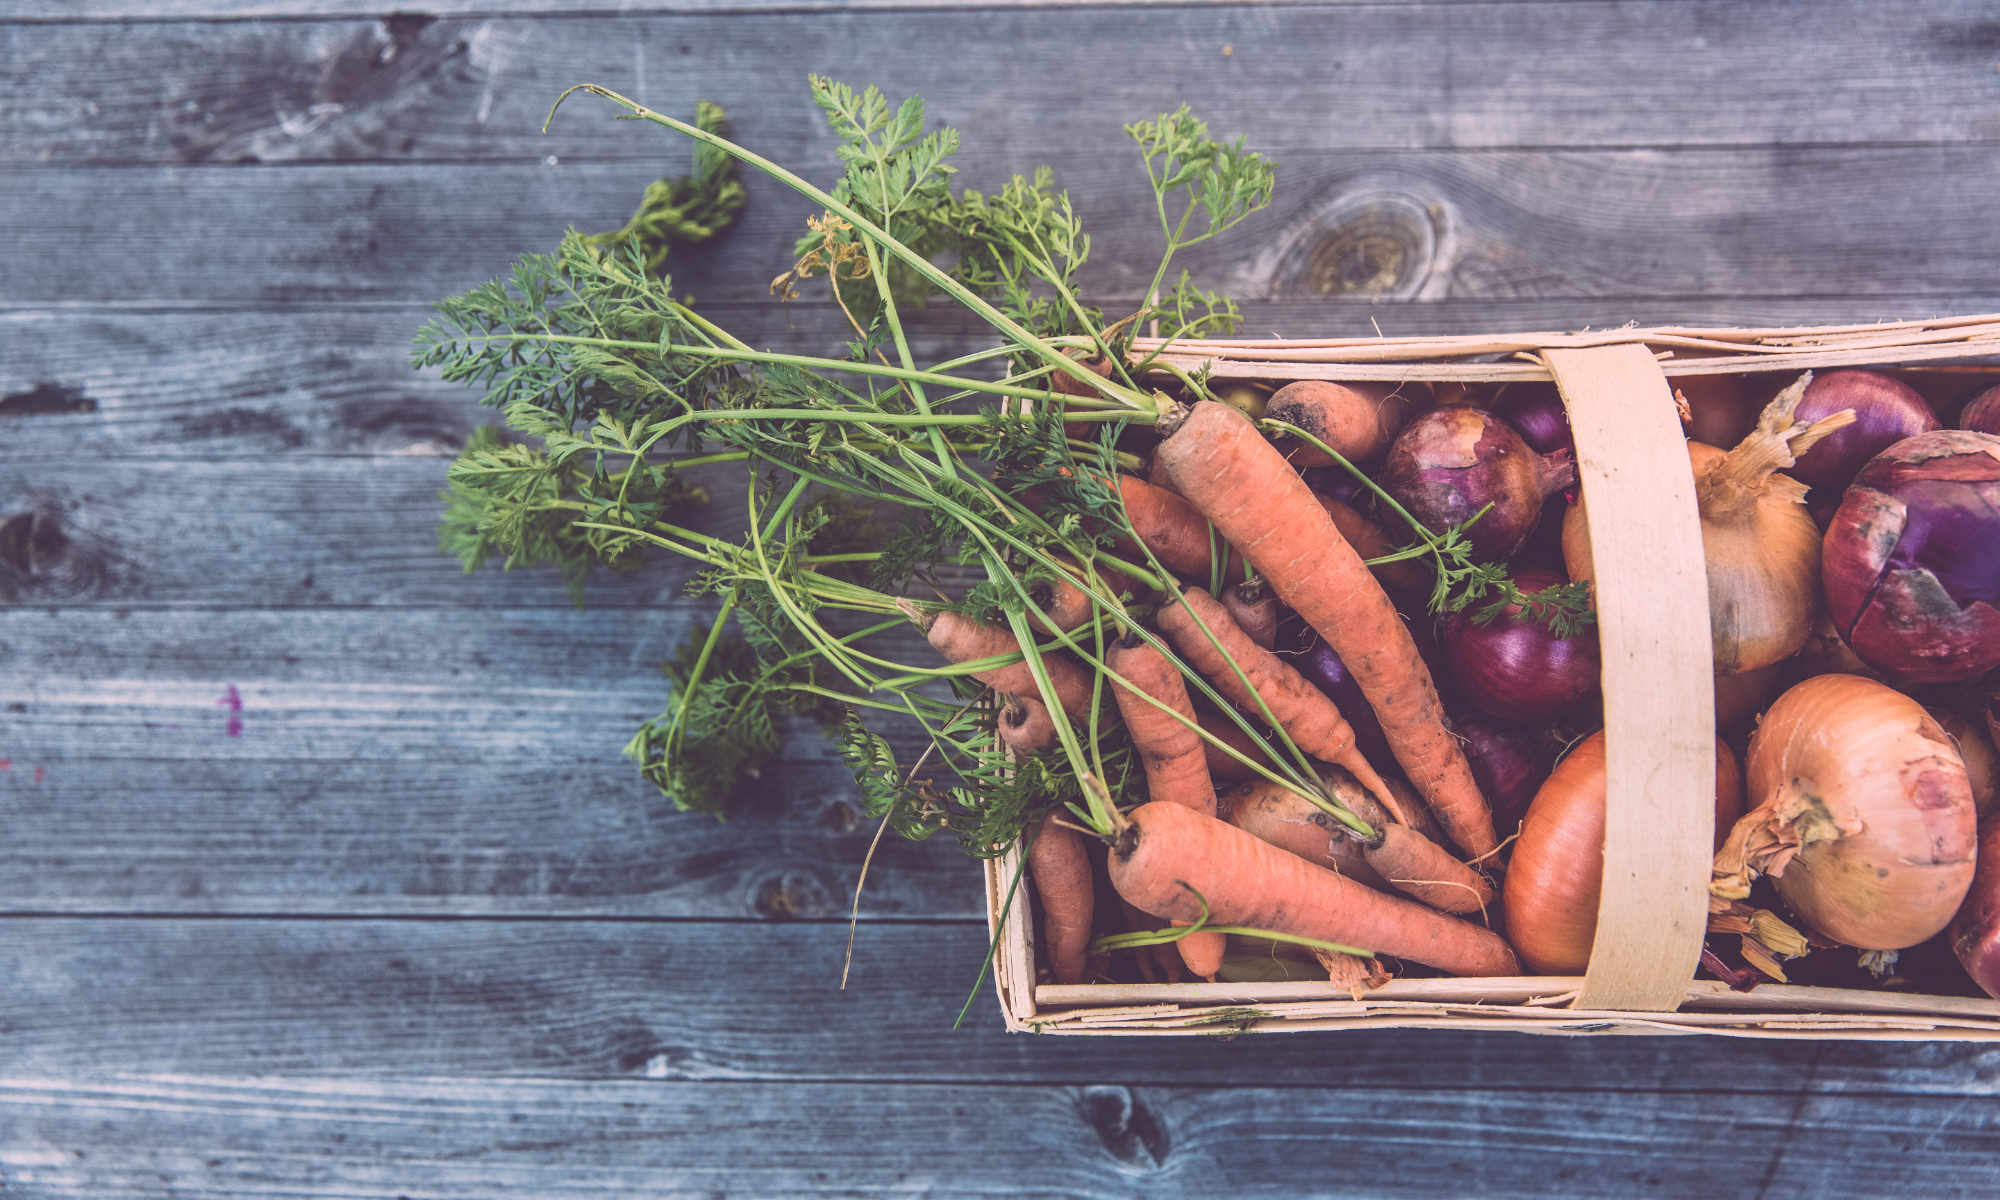
Hello friends! Garden season is in full swing here and we are starting to reap all the tasty rewards of our little garden patch. I would say my gardening skills are amateur at best, but I do know that the garden waits for no one and when the veggies are ready…they’re ready, whether you are are not!

So what do you do when the bounty from your garden is more than you can possibly eat? You could be a good neighbor and share the wealth, or you can find ways to preserve that summer garden deliciousness for a later date! (Or do both! Showing up on your neighbor’s doorstep with a jar of this Kale Pesto is sure to score you big neighbor points!)

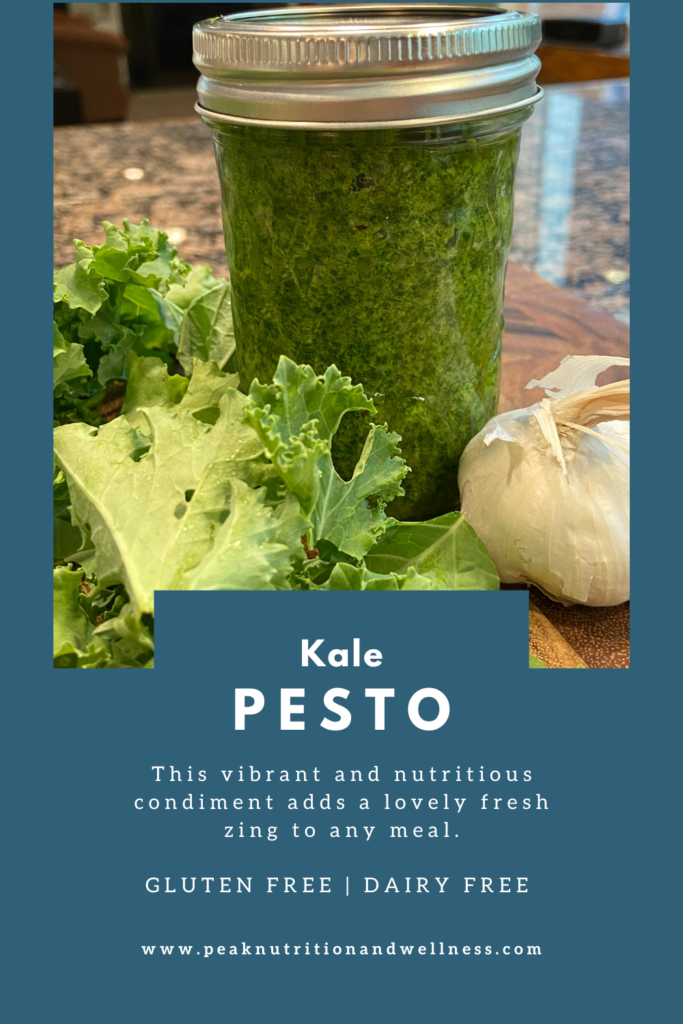
This vibrant creation isn’t just a taste explosion; it’s a nutritional powerhouse that is super versatile and easy to incorporate into almost any meal.

Kale Pesto (Gluten and Dairy Free)

🌱 The Nutrient-Rich Boost of Kale:

Kale is known as a superfood, and for good reason. Packed with essential vitamins, minerals, and antioxidants, kale supports overall health and vitality (1). Its substantial fiber content contributes to a healthy gut, which is essential for overall health.

Kale is a member of the cruciferous family of vegetables. Probably my favorite family of veg, it also includes cauliflower, cabbage, brussel sprouts, broccoli, collard greens, rutabaga and turnip. I mean, what’s not to like? Besides being uber delicious, this family of vegetables is known for their health benefits, which include supporting the immune system, supporting detoxification, regulating blood pressure and even potentially reducing the risk of various cancers (2)(3)(4).

🍽️ Pesto, Your Meal Prep Ally:

Even if my hard sell on the nutritional benefits of kale hasn’t swayed you, the tasty zing this pesto will add to your meals will! Whether you’re drizzling it over zucchini noodles, tossing it with roasted veggies or mixing it into your scrambled eggs, Kale Pesto elevates your meals by infusing them with yumminess (and nutritional goodness😉). It’s a simple way to add some excitement to your plate.

🥦 Reduce Food Waste with Pesto:

Got extra produce hanging out in your fridge, unsure of its destiny? We’ve all been there! Whether you got extra zealous in the produce aisle this week or your garden produced more than you can get through, don’t let those greens go to waste!

Kale, spinach, arugula, carrot tops, basil, cilantro, heck, even that carton of Spring Mix that never stays fresh as long as it should – you can turn any green into a delicious pesto. Best part? Pesto freezes like a champ, allowing you to enjoy the harvest’s bounty throughout the year.

🔃 Saavy Swaps

I stuck with the traditional pine nuts for this recipe. Truth be told, I sent my hubby to the grocery store with my list and, dutifully, he followed it to a tee. Those pine nuts were EXPENSIVE y’all! Had I been there, I likely would have made a game time decision to swap those babies out for something a little more budget friendly.

There are plenty of alternatives you can use for the pine nuts – almonds, walnuts, pepitas, even hemp hearts. If you are sensitive to nuts and/or seeds, make your pesto without! You may need to decrease the amount of oil to keep the pesto from being too runny.

I kept this recipe dairy free by subbing in nutritional yeast for the more traditional Parmesan cheese. Nutritional Yeast adds a bit of that cheesy flavor without the dairy. It’s also a great source of Vitamin B12. If you tolerate dairy, feel free to use 1/2 a cup of grated Parmesan cheese in place of the Nutritional Yeast.

Kale Pesto (Gluten Free/Dairy Free)

A fresh take on an old classic, this fresh and vibrant pesto is a delicious and nutritious accompaniment to any meal!
Prep Time 10 minutes
Total Time 10 minutes
Servings 2.5 cups approx.

Equipment

  • 1 Food Processor
  • Measuring Cups
  • Measuring Spoons
  • Zester/Microplane
  • Mason Jars for Storage
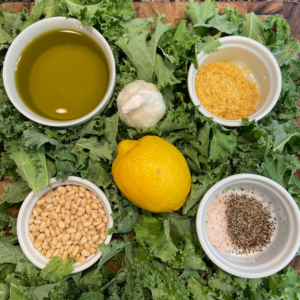
Ingredients
  

  • 4 packed cups Kale (de-stemmed, washed, dried and chopped or torn into small pieces)
  • 2 cloves Garlic
  • 2 TBSP Nutritional Yeast
  • 1 cup Pine Nuts
  • 2 Lemons (zested and juiced) Approx. 4 tablespoons lemon juice
  • 1 cup Extra Virgin Olive Oil
  • Sea Salt and Black Pepper to taste

Instructions
 

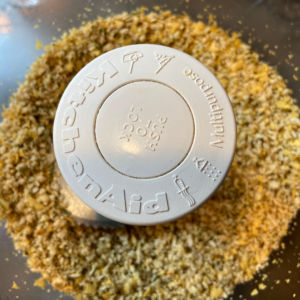
  • With your processor's blade in place, add peeled garlic cloves and pine nuts to the bowl of your food processor and pulse until chopped to a fine texture.
  • Add chopped kale, lemon zest and the juice of the 2 lemons to the food processor.
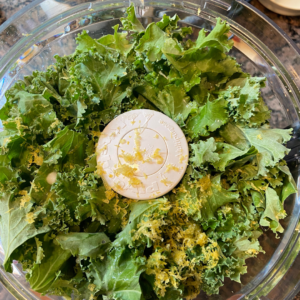
  • With processor running, slowly pour the oil into the bowl of the food processor until everything is combined.
  • Add nutritional yeast and pulse to combine.
  • Add sea salt and pepper to taste and pulse a few times to combine.
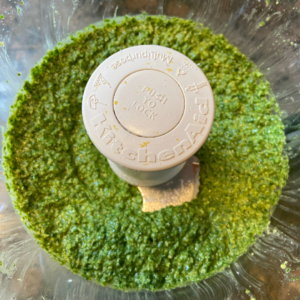
  • Transfer pesto into mason jars. You can choose to heat seal jars, but I simply pop the jars in the freezer (leave some room at the top of the jar for expansion.
  • Keeps in fridge for approx. 5 days or in the freezer for 3 months.

Notes

  1. If you tolerate dairy, you may choose to substitute 1/2 a cup of grated Parmesan cheese for the Nutritional Yeast.
  2. Other nuts or seeds may be substituted for the pine nuts or a combination of nuts and seeds could be used. Some options include walnuts, pumpkin seeds or hemp hearts.
  3. Use pesto over roasted meats, swirl it into your scrambled eggs, toss with roasted vegetables or make a gluten free pesto pasta by tossing it with some spiralized zucchini and cooked chickpea pasta.
Keyword dairy free, gluten free, kale, pesto, sauces

Sources:

  1. https://fdc.nal.usda.gov/fdc-app.html#/food-details/168421/nutrients
  2. Morrison, M. E. W., Joseph, J. M., McCann, S. E., Tang, L., Almohanna, H. M., & Moysich, K. B. (2020). Cruciferous Vegetable Consumption and Stomach Cancer: A Case-Control Study. Nutrition and cancer72(1), 52–61. https://doi.org/10.1080/01635581.2019.1615100
  3. Bayat Mokhtari, R., Baluch, N., Homayouni, T. S., Morgatskaya, E., Kumar, S., Kazemi, P., & Yeger, H. (2018). The role of Sulforaphane in cancer chemoprevention and health benefits: a mini-review. Journal of cell communication and signaling12(1), 91–101. https://doi.org/10.1007/s12079-017-0401-y
  4. Hodges, R. E., & Minich, D. M. (2015). Modulation of Metabolic Detoxification Pathways Using Foods and Food-Derived Components: A Scientific Review with Clinical Application. Journal of nutrition and metabolism2015, 760689. https://doi.org/10.1155/2015/760689

💚 Unlock Your Body’s Natural Healing:

If you’re ready to take charge of your health and make sustainable changes to your diet and lifestyle, I’m here to support you every step of the way. As a functional, holistic nutritionist, I specialize in helping individuals like you find relief from symptoms that have been ruling your life. Say goodbye to low energy, restless nights, and digestive discomfort – and say hello to a life filled with energy and vibrancy!

For more information on my One to One Nutritional Consults, contact me here.

Want to change your health for the better in just 5 weeks? Learn more about my RESTART® Program here.

Looking for a unique getaway that doesn’t undo all the hard work you’ve put into your health and nutrition? Escape the ordinary with our September 2024 Cruise Croatia Gluten Free Charter!

Remember, your road to better health starts with a single step! Don’t go it alone, let me help you take your health to new heights! 🌿🌈🌱

The (Super)Powers of MicroGreens

It’s garden season and nothing is cooler than finally seeing those little shoots start to emerge from the soil. But did you know that these tiny plants are like nutritional powerhouses in miniature form?

The (Super)Powers of Microgreens

What are Microgreens?

Microgreens are immature plants harvested around 1 to 2 weeks after germination. They are usually 1-2 inches long and include the stem and leaves. 

Are Microgreens and Sprouts the Same Thing?

No! While both are little nutritional powerhouses, microgreens are grown in soil (or a growing pad) and the stem and leaves are eaten. The seed is not consumed. Sprouts are grown in water and the stem and seed are consumed.

Types of Microgreens

These are just a few of the variety of microgreens:

  • Radish
  • Broccoli
  • Basil
  • Peashoots
  • Beets

Health Benefits of Microgreens

Bursting with vitamins, minerals, and enzymes, microgreens offer a range of health benefits. In fact, they can contain up to 40 times the nutrients of the full grown plant!(1) Let’s take a closer look at what microgreens bring to the plate:

  • Nutrient-Rich: Radish microgreens are packed with essential nutrients like vitamins A, C, and E and minerals including zinc, iron, and magnesium. (1) These gems support energy production, immune function, bone health, and more, helping you reclaim that pep in your step! 💥
  • Digestive Support: Are you dealing with bloating, IBS, or heartburn? Adding microgreens to your meal could help your digestion run more smoothly. They contain enzymes that aid digestion and enhance nutrient absorption and are high in fiber. This fiber is a prebiotic, providing a source of food for the good bacteria in your gut. Imagine that? Relief through REAL FOOD! (2)
  • Inflammation Tamer: Joint pains got you down? Microgreens are rich in antioxidants that help combat inflammation in the body. By including them in your meals, you’re helping support overall joint health.(3) 🕺🌱

How to Incorporate Microgreens into Your Meals

Now that we’ve got the sciency stuff out of the way, let’s look at how to get more of these little delights into our diets!

  • Salads: Upgrade your greens game by adding a generous handful of microgreens to your favorite salads.Their crisp texture, fresh flavor will be a welcome addition! 🥗🌱
  • Sandwiches: Elevate your sandwich by layering on some microgreens for an extra crunch and burst of nutrients. They’re a perfect match for avocado, roasted veggies, or your protein of choice. 🥪✨
  • Smoothies: Power pack your morning routine by tossing a handful of microgreens into your smoothie. You’ll be amazed at how well they blend with fruits and greens, giving your smoothie an extra nutritional punch. 🥤💪
  • Stir-Frys: Throw a handful of microgreens into your stir-fry toward the end of cooking. This will preserve their crispiness and add a burst of freshness to your dish. Your stir-fry game just got a major upgrade! 🍲
  • Soups: Top your bowl of soup with microgreens to not only give it that restaurant-like pizzaz, but an extra helping of good-for-you nutrients.🥣

Growing Radish Microgreens

Even if your thumb is far from green, you can grow radishes (and, therefore, radish microgreens)! Radishes are a fast going crop and one of the quickest ways to get homegrown microgreens into your diet. Within as little as 7 days of planting the seeds, you’ll have adorable little shoots! When they are 1 to 2 inches tall, thin the rows by removing some shoots, leaving about 2 inches between plants. Crowded radishes don’t grow well. You can now add your harvested microgreens to your meal! The remaining shoots will continue to mature into radishes (or, if your goal is to only grow microgreens, you can harvest the lot and start a fresh batch!)

No garden? No worries!

You can easily grow microgreens indoors. Check out THIS article for the How-To.

Incorporating radish microgreens into your diet is a small but powerful step towards nurturing your gut and overall well-being. So, grab a handful of these nutrient-packed greens and let them work their magic!

🌱💚 Unlock Your Body’s Innate Healing Power:

If you’re ready to take charge of your health and make sustainable changes to your diet and lifestyle, I’m here to support you every step of the way. As a functional, nutritional therapy practitioner, I specialize in helping individuals like you find relief from symptoms that have been ruling your life. Contact me HERE.

Sources:

  1. Zhenlei Xiao, Gene E. Lester, Yaguang Luo, and Qin Wang. (2012). Assessment of Vitamin and Carotenoid Concentrations of Emerging Food Products: Edible Microgreens. Journal of Agricultural and Food Chemistry, 60 (31), 7644-7651
    DOI: 10.1021/jf300459b
  2. Holscher H. D. (2017). Dietary fiber and prebiotics and the gastrointestinal microbiota. Gut microbes8(2), 172–184. https://doi.org/10.1080/19490976.2017.1290756
  3. M. H. Ahmed et al. (2015). Phenolic Composition, Antioxidant Potential, and in vitro Digestibility of Different Parts of Sprouted Radish (Raphanus sativus L.), Journal of Food Science and Technology, vol. 52, no. 12, pp. 7855–7863.

Naturally Dyed Easter Eggs

Naturally Dyed Easter Eggs

Easter is wonderful time of year to celebrate spring and new beginnings. One of the most popular Easter traditions is dying eggs, but most store bought kits use dyes full of artificial colors and chemicals. These are neither good for the earth or good for our bodies!

Artificial colors are known carcinogens and can trigger both allergies and hyperactivity. By using ingredients from our own kitchens/gardens, we can create beautifully dyed eggs with colors that are safe to handle and consume! (Eggs are like GOLD in my area of the world right now…expensive and hard to come by, so we definitely don’t want to just toss them!)

How to Create Natural Dyes

  1. Choose your natural dye ingredients. Some common ingredients include: red cabbage (for blue dye), beets (for pink or red dye), turmeric (for yellow dye), onion skins (for orange, brown or lavender dye), and spinach (for green dye).
  2. Hard boil your eggs and let them cool.
  3. Prepare your natural dyes by simmering your chosen ingredients in water for 15-30 minutes until the desired color is achieved. The color of the dye should be a few shades darker than you want the finished egg to be. Strain out any solids.
  4. Add 1 tablespoon of vinegar to each cup of dye to help the color adhere to the eggs.
  5. Dip your eggs into the dye and let them sit until the desired color is achieved. You can leave them in for a few minutes to a few hours. If you going to be leaving the eggs in the dye for a long period of time, be sure to let them soak in the fridge.
  6. Remove the eggs from the dye and let them dry. You can place them on a wire rack or use a paper towel to blot away any excess moisture.
  7. Display your beautiful, naturally dyed Easter eggs and enjoy! (Be sure to refrigerate eggs if you are planning to consume them!)

Common Natural Dye Ingredients

Here are some common natural ingredients for dyeing Easter eggs and the colors they produce:

  1. Red/pink: beets, raspberries, cranberries, pomegranate juice
  2. Orange: yellow onion skins, paprika
  3. Yellow: turmeric, saffron, carrot tops, chamomile tea
  4. Green: spinach, parsley, cilantro, nettle tea
  5. Blue: blueberries, red cabbage leaves, blackberries, purple grape juice
  6. Purple: red onion skins, hibiscus tea, blackberries
  7. Brown: coffee, tea, walnut shells

The final color is dependent on whether you use white or brown eggs. Use a mix of both to achieve more color variety!

Get Creative!

If you want to create designs or patterns, you can use stickers, tape and rubber bands to create patterns. Try using natural elements, like leaves, to create a pretty springtime flair. Then, dye the eggs , allow to dry, remove the material you used to create the pattern and reveal your design.

When dyeing eggs with natural materials, keep in mind that the colors may not be as vibrant or consistent as they are with store-bought dye kits. However, the unique and natural colors that you can create are worth the effort. Experiment with different natural materials and techniques to find the perfect colors for your Easter eggs. Happy dyeing!

Sources

https://pubmed.ncbi.nlm.nih.gov/23026007/

Pumpkin Spice Latte (gluten free, dairy free, refined sugar free)

Pumpkin Spice Latte" data-pin-description"A healthier version of everyone's fall favorite! Gluten Free, Dairy Free and Refined Sugar Free #pumpkinspice #latte #glutenfree #dairyfree #homemade #refinedsugarfree #cashew #spices #realfood #healthyswaps #peaknutritionandwellness #nutrition #functionalnutrition

Happy Fall! I love the beginning of the autumn months, with the chilly mornings and lovely warm afternoons. By September, I’m usually ready to put the grill aside in favor of some slow braised stews or comforting soups.

For many, the arrival of fall means just one thing…PUMPKIN SPICE SEASON!

Pumpkin spice seems to dominate everything nowadays…from lattes to candles to snack mixes (just walk into a Trader Joe’s in fall and take a gander at their pumpkin spice offerings!)

But the OG, the latte, is what we are here for! If you’ve been avoiding those Pumpkin Spice Lattes from your favorite barista…well, first of all, good for you! 👏👏👏

At 39g of sugar in just a Tall PSL, you are definitely doing yourself a favor! (That’s roughly 10 teaspoonsful of sugar in that little cup!)

Although the sugar gives the ol’ PSL a bad rap, the spices that make up the warming pumpkin spice blend are pretty darn good for us! Check out the benefits below!

Luckily, we can still keep a little spice in our life and avoid the sugar shock by recreating a healthier version of our favorite fall beverage at home. For my healthier PSL, I use maple syrup (which yes, is still sugar, but it is unrefined. This means it still contains other nutrients). It’s also really easy to adjust the quantity, so we can enjoy a little sweetness without the sugar crash.

I also use Cashew Butter (specifically, I use addJoi’s Cashew Base) which gives the creaminess. I have no affiliation with them, I just really like their products, as they have no additives! Many dairy free milk products contain thickeners or emulsifiers which irritate the gut, affect gut health by increasing intestinal permeability and/or contribute to an overgrowth of the intestinal bacteria. I encourage you to check addJoi out!

You can choose to sub in your favorite dairy free milk alternative, but may have to adjust the strength of the coffee to get the right mix, as the extra liquid will water down the latte a bit. If you enjoy a weaker cup, it might work great for you!

Are you like me and prefer your latte iced? I think my love of iced coffee comes from my pharmacist days where I would sip from the same cold cup of coffee all shift long! To make it frosty, simply blend and pour into a glass over ice!

Let me know what you think! Enjoy! 🍂

Pumpkin Spice Latte

A healthier alternative to the Fall favorite!
Prep Time 5 minutes
Total Time 5 minutes
Course Drinks
Servings 1

Ingredients
  

  • 1 cup strongly brewed coffee
  • 1 tbsp organic cashew base (I use the one from addJoi)(https://addjoi.com) can substitute cashew butter
  • 1 tbsp pumpkin puree
  • 1-3 tsp maple syrup
  • 1/4 tsp pumpkin spice blend (see notes for recipe)

Instructions
 

  • Add all ingredients to a blender. Whir it up until frothy and enjoy!
    Note: Start with 1 tsp of maple syrup, you can add more if desired or omit if you prefer a sugar free version.
  • Pour into mug and top with an extra sprinkle of Pumpkin Spice Blend

Notes

 
You can try substituting other nut butters, but I find cashew is the creamiest (less grainy) and works the best.
 
Pumpkin Spice Blend
  • 1 tsp cinnamon
  • 1/4 tsp ground ginger
  • 1/4 tsp ground nutmeg
  • 1/8th tsp ground clove


Keyword dairy free, gluten free, healthy fats, refined sugar free

Summer Quinoa Salad with Herbs

Jump to Recipe

Hot summer days are the perfect time to break out those refreshing salad recipes. This quinoa salad has been a go-to of mine for years! With it’s balance of crisp veg, a tangy umami filled dressing and refreshing herbs, it’s SO crave-able. Downright addictive!

I’ve been making this salad for so long, that I don’t recall where the original inspiration came from! I do know that I swapped in coconut sugar and avocado oil as healthier alternatives in the dressing. Coconut sugar is less refined that white or brown sugar and does not have as quick an impact on blood sugar levels. Avocado oil (or olive oil) is a more stable fat than vegetable oils, like canola oil. Vegetable or seed oils are fragile fats that are damaged during processing and highly inflammatory.

Quinoa is a seed that is naturally gluten free and provides a fairly good punch of protein for a plant food. Unlike most plant based foods, it contains all 9 essential amino acids, making it a complete protein. I tend to cook a whole bunch of quinoa at one time and freeze it in “salad” size portions (3 to 4 cups of cooked quinoa), so when the urge for this salad or my Curry Quinoa Salad hits, I’m one step closer to digging in!

Quinoa also is coated in saponins, a bitter tasting compound that acts as an insecticide for the plant. Rinsing your quinoa with cold water prior to cooking it will remove the saponin and prevent that bitterness from transferring to you finished product!

Feel free to mix up the veggies in this salad or omit herbs you may not be fond of (for you cilantro haters out there!). It makes a great addition to summer picnics or BBQs, as it can sit at warmer temps without spoiling.

Eat it on its own or add your favorite protein (shrimp is delicious with this) and enjoy!

Summer Quinoa Salad with Herbs

A refreshing, flavor packed salad that's great as a side or on its own!
Prep Time 30 minutes
Total Time 1 hour 30 minutes
Course Main Course, Salad, Side Dish

Equipment

  • 1 Medium Saucepan
  • 1 Strainer (fine mesh) for rinsing quinoa prior to cooking
  • Knife
  • Cutting board
  • Whisk
  • Small bowl for mixing the dressing
  • Large Salad Bowl
  • Tongs or utensils for mixing salad ingredients

Ingredients
  

  • 1 & 1/3 cup Quinoa
  • 2 & 1/3 cups Water
  • 1 Red Bell Pepper diced
  • 1 English Cucumber diced
  • 1 cup Grated and Shedded Carrot
  • 2 Scallions finely chopped
  • 1/4 cup Cilantro finely chopped
  • 2 tbsp Mint finely chopped
  • 2 tbsp Thai Basil (or sub regular basil) finely chopped

Dressing

  • 1.5 tbsp Avocado oil or Olive Oil
  • 2.5 tsp Red Boat Fish Sauce
  • 2 tbsp Coconut sugar
  • 1/4 cup lime juice
  • 1/2 tsp Sea Salt
  • 1/4 tsp Red Pepper Flakes

Instructions
 

Quinoa

  • Rinse quinoa throughly under cold water.
  • Add quinoa and water to saucepan and bring to a boil over medium high heat.
  • Once boiling, reduce heat to low and simmer, covered with lid, until water has been completely absorbed (15 to 20 minutes).
  • Remove from heat and allow to sit with lid on for 5 minutes.
  • Remove quinoa from pot. If making the salad immediately, place quinoa in fridge to cool for 20-30 minutes before assembling salad.

Dressing

  • Combine fish sauce, lime juice, sugar, salt, red pepper flakes and oil in a small bowl and whisk to combine and dissolve sugar. Set aside.

Salad

  • Combine cooled quinoa, red pepper, cucumber, carrots, scallion and herbs in bowl.
  • Pour dressing over contents of bowl.
  • Toss well to combine.
  • Chill in refrigerator prior to serving.
  • Keeps well in the refrigerator for several days.

Notes

Add a protein, such as grilled chicken or shrimp, to make this a main course salad.
There are a number of recommended quinoa to water ranges out there. Many recommend 2 parts water to 1 part quinoa. I’ve found that 1.75 cups of water for every cup of quinoa works well for me and provides fluffy, not soggy, quinoa. Start with the directions on your bag of quinoa and adjust from there. Experiment with what ratio works best in your kitchen!
 
Keyword dairy free, gluten free, healthy fats