The RESTART® Program

The RESTART® Program - Start your journey to better health now!

It’s hard to believe summer is soon coming to an end. As much as I’ll hate to see the Pacific Northwest rain clouds replace the summer sunshine, I do love autumn. The colourful leaves, crisp air on morning walks, cozy sweaters and swapping out grilled foods for some comforting, slow cooked fare – all are great reasons to embrace the change of the season!

As the weather changes outside, it’s also a great time to check in with our internal environment and how we are feeling. Tuning into our bodies and the subtle messages they send us is something most of us need to work on. Our lifestyles and responsibilities keep us focused on, and prioritizing, pretty much everything but ourselves! We take our cars in for regular inspections (or, um, we should), so we should definitely be doing regular “mileage” inspections on the state of our well-being!

Check-in With Yourself

Take a few minutes during your day. Find someplace quiet and free of distractions. Drop out of your stressed, fight and flight state by taking several slow, deep belly breaths. Now – what are you noticing? Some questions you might ask yourself are:

How’s my energy level? Are you dragging yourself through the day, fuelled on caffeine and sugar? Do you need to snack to make it through to your next meal?

How am I sleeping? Are you getting 7-8 hours of quality sleep? Do you wake up during the night and can’t fall back asleep? Do you wake up tired or refreshed?

How’s my digestion? Symptoms like heartburn, bloating, constipation, diarrhea, abdominal pains, stools that float or are light coloured, or undigested food in the stool are all warning lights that require some attention.

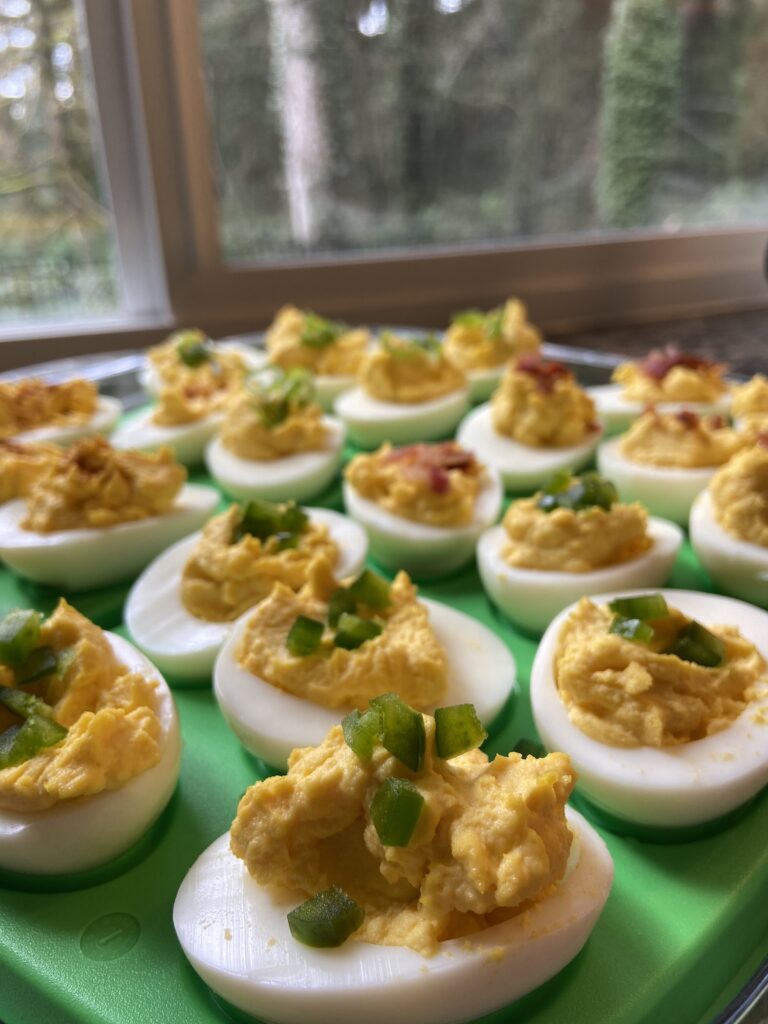
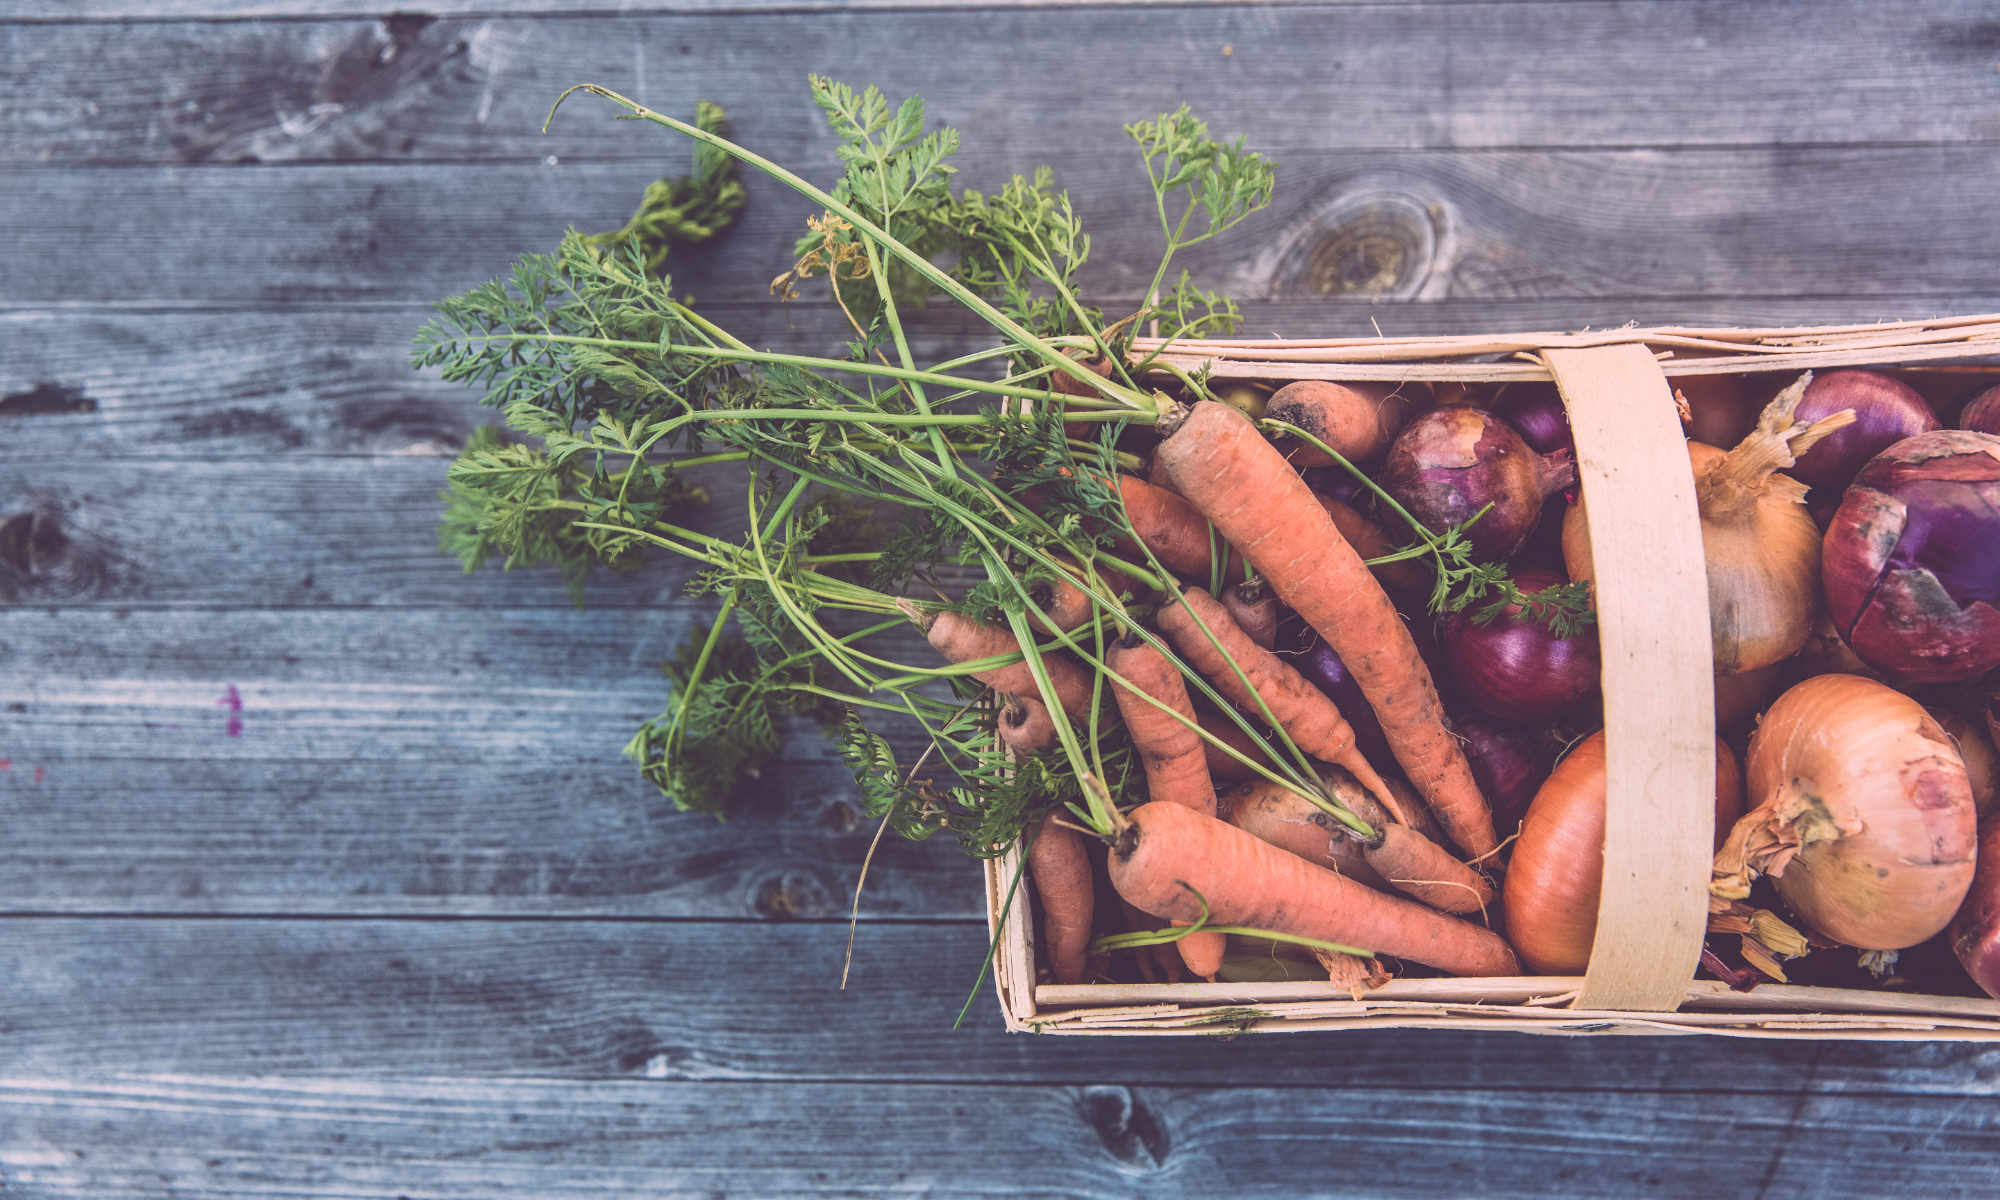
Am I nourished? Feeding ourselves regularly doesn’t necessarily mean we are nourishing ourselves. Relying on packaged and processed foods, hitting the drive thru on the reg and consuming foods high in sugar might fill the belly, but they aren’t fuelling your body with the nutrients it needs to work optimally.

What other things are showing up that aren’t “normal”? – Headaches? Joint Pain? Anxiety? Skin rashes? We often get so used to these type of symptoms that they become our status quo. They may be common, but they aren’t NORMAL. Symptoms are your body’s warning lights and it’s way of telling you something isn’t right!!

Now that you’ve run through your checklist, what have you discovered?

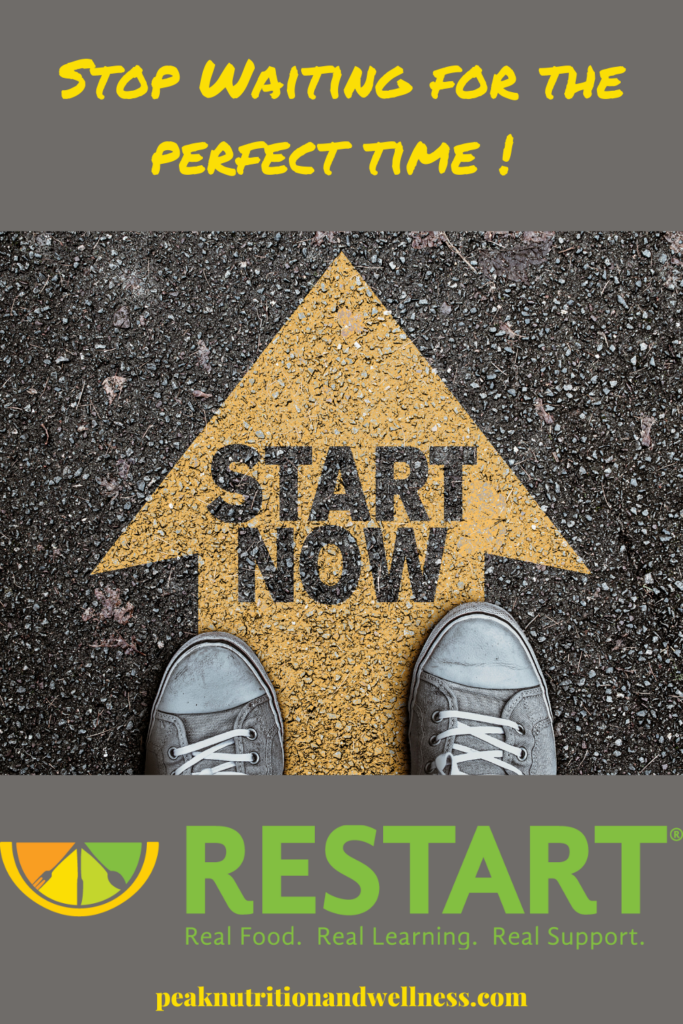
It could be you realize summer ice creams have become a daily occurrence or you completely Hulk out on anyone in your vicinity when you miss your between meal snack. Maybe you can’t remember the last time you slept through the night or perhaps the drive-thru guy knows you by name. You might realize your bathroom has become your second home or, you can’t pinpoint exactly what is wrong, but you know you just don’t feel your best. If any of these things hit home, it may be time for a RESTART®.

What is RESTART®?

The RESTART® program is a 5 week, online, group program that combines loads of nutritional education and a 3 week sugar detox. When you add in the element of group support, it’s a powerful (and fun!) combination.

Who should RESTART®?

Whether you have been dabbling in healthy eating for awhile or don’t know your kale from your kohlrabi, RESTART® is for you! It’s the perfect combination of education and action that teaches you, not only how food affects us, but lets you experience how powerful real food can be. RESTART® is great for individuals, couples or families. You can join with a friend to have an accountability buddy or make pals in class or the free Facebook group.

Since the classes are conducted via Zoom, you can join from the comfort of home, no matter where in the world you are located!

Why RESTART®?

Maybe the question should be “Why NOT RESTART®”? Let’s face it, most of us need to do a better job of putting ourselves, and our health, first. Self-care isn’t selfish! To paraphrase a quote from Katie Reed, self care allows you to give the world the best of you, instead of what’s left of you!

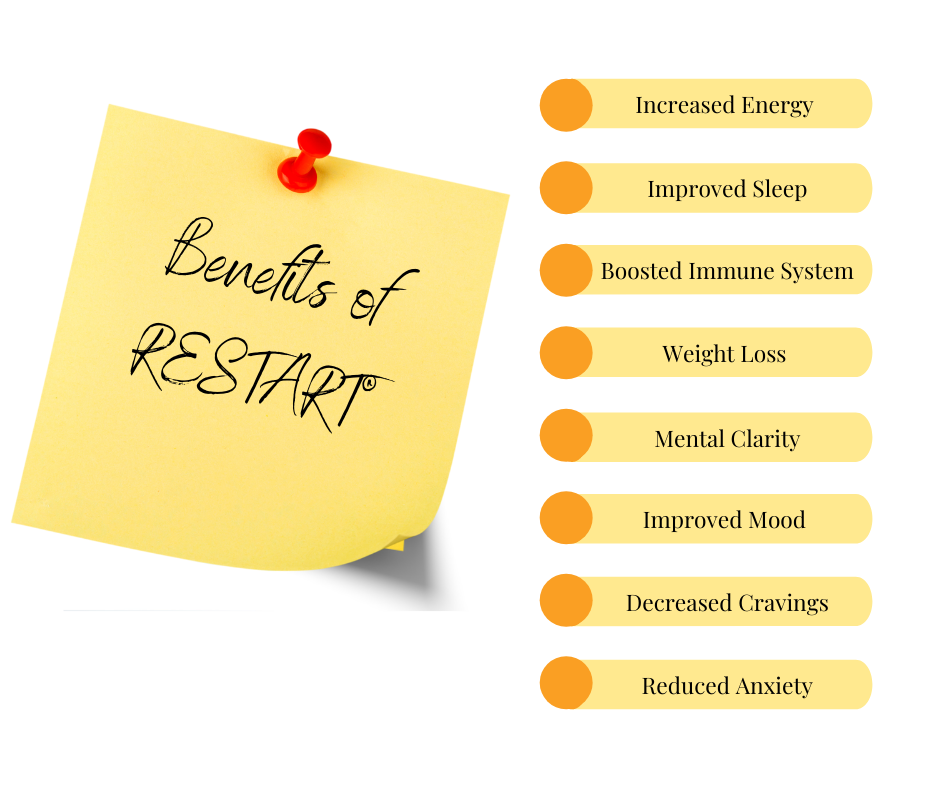
Everybody gets a little something different out of the RESTART® program. Below is a list of some of the benefits RESTART® participants have experienced.

Benefits of the RESTART® Program

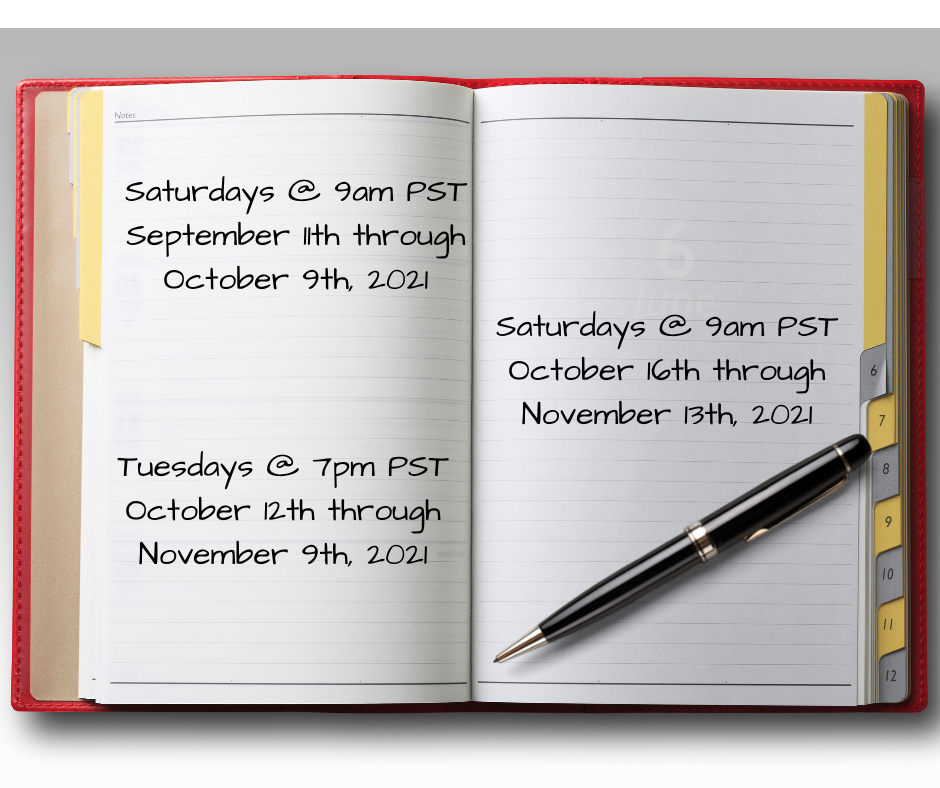
Where and When is RESTART®?

I’m super excited to be offering THREE different class times this fall! All classes are conducted live on Zoom.

How can I register for RESTART®?

If you think you could use a RESTART®, you can register for class by clicking HERE.

If you have more questions about RESTART®, visit the RESTART® page on this website or send me a message HERE. I’d love to chat with you about it!

Oh! One last thing! If you don’t see a class time that fits your schedule, contact me. I’m happy schedule additional group classes (minimum of 4 participants) at a date and time that works for everyone!

What are you waiting for? Go on! Get (RE)STARTED!!

The Monday Mention – Put Your Heart In Your Mouth by Dr. Natasha Campbell-McBride

The Monday Mention: Put Your Heart in Your Mouth by Dr. Natasha Campbell-McBride

In her book Put Your Heart in Your Mouth, Dr. Natasha Campbell-McBride delves into the true cause of heart disease and many other degenerative diseases. By exploring the many processes our bodies use to heal and repair themselves, she shows us that the true culprits behind the modern-day heart disease epidemic are not, as we have so often been told, cholesterol and saturated fat. In fact, these wrongly vilified substances are vital parts of the body’s healing process. The true villain in this story is inflammation or, to be more precise, chronic inflammation resulting from our modern lifestyles. High stress, diets of processed and refined food, as well as toxins in our environment, home, on our bodies and in our foods, all lead to damage in our blood vessels.

Dr. Campbell-McBride devotes a section of the book to explaining how necessary cholesterol is to our health. She explains that, along with saturated fats, it has received the brunt of the blame for coronary artery disease simply because they are present in the plaques seen in atherosclerosis. Once one understands that cholesterol and saturated fat are essential in the formation of strong cellular walls and necessary in the repair of injured tissue, we begin to see how inflammation is at the core of the problem. The author explains that chronic, unrelenting inflammation means that the repair of the tissue must also be occurring constantly. This constant repair is what leads to accumulation of larger and larger plaques. The bigger the plaque becomes, the more unstable and liable to rupture it is. Another interesting fact the author relays regarding these plaques is that, of the fats contained in them, the majority is not the “evil” saturated fats most doctors blame. It is the unsaturated fats, like those found in the vegetable and cooking oils most used today, that are the predominant fats present in the core of atherosclerotic plaques.

The Monday Mention: Put Your Heart in Your Mouth by Dr. Natasha Campbell-McBride
Want to understand the root cause of heart disease? Start here!

The book doesn’t just describe how we come to develop heart disease but lays out ways that we can avoid it. Incorporating whole, organic, properly prepared foods into our diets and avoiding the processed foods and sugar which encourage inflammation either directly or by causing nutrient deficiencies that impair our inflammatory response. As the “Gut Health Girl”, I was glad to see a portion of the book dedicated to the importance of digestive health and the microbiome in supporting cardiovascular well-being. Hippocrates famously said that “All disease begins in the gut” and this includes cardiovascular disease! A healthy gut has beneficial bacteria that produce and release several vitamins crucial to protecting the cardiovascular system. When we are deficient in Vitamin K2, we see greater deposition of calcium in the arteries (arteriosclerosis) and more inflammation. Homocysteine, an amino acid that is very caustic to the lining of our blood vessels, is held at bay by adequate amounts of folate, Vitamin B6 and Vitamin B12. All of these are manufactured by our gut flora.

In reading through this book, I noticed how strongly Dr. Campbell-McBride’s writing correlates with what I discuss with my Nutritional Therapy clients. From the idea that the modern Western diet is at the core of most disease to how stress management, attitude and movement all play a role in supporting health, we are on the same mission to inform and empower people to optimize their health. I found the book enjoyable to read and thought the author explained some complex subjects in a way that is very easy to understand. I think many of you would appreciate both how approachable she has made the information and that she provides a nice selection of recipes as a starting point to eating healthier and preventing heart disease.

If you’d like to learn more about Nutritional Therapy and how it can support your body’s innate ability to heal, fill out the Contact Me form on my website!

Rating 5 Peaks
PEAK rating – 5/5 peaks!!

Devilishly Good Deviled Eggs

Devilishly Good Deviled Eggs
Jump to Recipe

One of my clearest food memories is of my Mom’s Deviled Eggs. I can still see the yellow Tupperware container with the special “egg holding” insert that she used. I wouldn’t say she made them all that often, but usually when you saw that Tupperware container come out, you knew there was a party or holiday meal about to happen!

Mom’s eggs were DELICIOUS. A little sweet and a little tangy, thanks in part to a “miraculous” mayonnaise style condiment that was pretty popular while I was growing up. It probably STILL IS popular with a lot of folks, but with its high fructose corn syrup, fragile and damaged oil and various thickeners and fillers, it’s not something that’s invited into my grocery cart anymore.

So I knew if I wanted to relive that childhood food memory, I’d have to ditch the processed stuff and create my own version. I think they are just as tasty as the one’s I remember eating growing up. Different, but just as good. Well, maybe ALMOST as good because does anything ever taste as good as what Mom made? It’s that “the secret ingredient is love” thing. Pretty sure.

The funny thing about deviled eggs is that they are one of the few foods that really don’t smell all that great (they ARE kinda stinky), but almost everyone loves when they show up at a get together! I’ve taken them to numerous shindigs (they are a great potluck item for those of us avoiding gluten or dairy). When I arrive, I uncover the deviled beauties while sheepishly mumbling an apology for the odor, only to be cut off with excited exclamations by fellow party goers! “Oooo deviled eggs! I haven’t had those in ages!” “Wow! I love these things! I never make them because they are so much work!”

Truth? They are REALLY easy to make. Yeah, they take a bit more effort than grabbing a veggie tray from the supermarket (which there is nothing wrong with, by the way), but they definitely give the impression you put a lot more work in than you did. That’s never a bad thing.

The hardest part of making deviled eggs is getting hard boiled eggs that you can peel easily. There’s not much worse than trying to peel an egg and ending up with something that looks like the dog chewed on it, full of gouges and holes. I’ve found that the Instant Pot makes perfectly peelable eggs EVERYTIME! Feel free to go old school on the stove top, if that’s your style. I have read that fresh eggs don’t peel as easily as older eggs. I’ve never had an issue with the Instant Pot, but if you are boiling on the stove top, maybe buy your eggs a week or so ahead of time.

Alright – enough chit chat! Let’s get to the good stuff! How to make these wickedly good little things!

First step is to boil (or pressure steam) those eggs. I’m going to run with the Instant Pot instructions here, but I have included stove top directions in the recipe card.

Place your eggs in a single layer on the trivet (rack) of your Instant Pot.

Add 1 cup of cold water to the pot. Place and lock the lid onto the instant pot.

Ensure that the venting dial is set to SEALING and set the timer to 6 minutes under HIGH pressure.

When the timer goes off, immediately turn the venting dial to VENTING, making sure to avoid the high pressure steam that will be released. Once the pressure has lowered enough so that the lid unlocks, you can either remove the eggs to an ice bath or take the lazy person’s way (like me) and use pot holders to lift the stainless steel insert out of the Instant Pot and run cold water over the eggs. Allow the eggs to sit in the ice bath or cool water for about 10 minutes.

This would be a great time to make your mayonnaise. Click HERE to get my quick, easy and healthy Mayonnaise Recipe. You can use a store bought Avocado Oil or Olive Oil Mayo (just make sure to read those labels carefully!), but avoid any with hydrogenated or partially hydrogenated oils. Damaged, unhealthy fats make damaged, unhealthy bodies!!

Now the fun part! Peel those eggs! It is really SO easy with Instant Pot eggs – total game changer.

Once the eggs are peeled, slice each egg in half lengthwise and spoon out the yolks into a separate bowl. Set the whites aside for filling later. (Pro tip from my Mom…cook a couple more eggs than you need and use their yolks in the filling. This gives you a little extra filling to go around. Nobody likes skimpy deviled eggs! You can keep the whites to use in salads etc.)

Mash the yolks up with a fork and then add the mayo, mustard, apple cider vinegar, salt and pepper (if using). The measurements I give in the recipe are to my taste. I’d advise that, instead of dumping everything in, add the ingredients separately (even a bit at a time) mixing well in between and taste as you go. Depending on your own palate, how big your yolks are and even how thick your mayo turned out, you may want to adjust quantities a bit.

Once you’ve got the filling mixed so it’s smooth, fluffy and tasting great, spoon the mixture back into the yolk divots in the whites you set aside. You can get fancy and use a piping bag, but spooning it in with a teaspoon is quicker, easier and you don’t lose a whole bunch of your delicious filling on the sides of the bag.

Once filled, let your creativity flow and garnish those bad boys with whatever floats your boat. Bacon, chives, scallions, dill, jalapeño, smoked salmon, paprika, kimchi(pat it dry first!)… the options are endless.

Chill until serving. Keeps well, covered, in the fridge for 3 to 5 days. Enjoy! Let me know what topping you like on your devilled eggs in the comments!

If you want to find out more about the incredible, edible egg, check out my previous TRILOGY of posts on eggs!

Part 1 – What Do All Those Labels on Egg Cartons Really Mean?

Part 2 – Common Myths and Misconceptions about Eggs

Part 3 – The Nutritional Value of the Humble Egg

Print Recipe
Devilishly Good Deviled Eggs
Perfect for picnics and BBQs, game day feasts or potlucks, these little devils are quick and easy to prepare, free of processed ingredients and full of protein and healthy fats. A true crowd pleaser!
Prep Time 30 minutes
Servings
deviled eggs
Ingredients
Prep Time 30 minutes
Servings
deviled eggs
Ingredients
Instructions
Hard Boiling the Eggs (Instant Pot)
  1. Place the eggs in a single layer on the trivet in your Instant Pot.
  2. Add 1 cup of cold water to bottom of pot and place and lock lid. Make sure that the steam release valve on the lid is set to "SEALING".
  3. Turn the Instant Pot on and set it to cook under High Pressure for 6 minutes.
  4. As soon as the eggs have finished cooking, immediately release the pressure by turning the steam release valve to the "VENTING" position. (WARNING! Pressurized steam is HOT! Keep clear of the valve until pressure has released! You may also want to make sure your instant pot isn't directly under cabinetry so the steam does not damage the wood).
  5. Once the pressure releases to the point that the lid unlocks, carefully remove lid. Use tongs to transfer the eggs from the Instant Pot to an ice bath. Alternatively, you can remove stainless steel insert (using pot holders), place it in sink and run cold water over the eggs. Once cooled (about 10 minutes), you can store them in the fridge for about a week or, peel and use them immediately.
Hard Boiling the Eggs (Stove Top Version)
  1. Place the eggs in the saucepan in single layer and cover with cold water. The water should cover the eggs by at least an inch.
  2. Set burner to medium high heat and bring to a boil.
  3. Once the water reached the boil, cover and remove from heat.
  4. Let stand for 10 minutes.
  5. Drain and cool in an ice bath for approximately 10 minutes. Alternatively, you can place pot in sink and run cold water over the eggs. Once cooled, you can store them in the fridge for about a week or, peel and use them immediately.
Devilled Eggs
  1. Peel eggs and slice them in half lengthwise, dropping the cooked yolks into a small bowl and reserving the cooked whites to fill later.
  2. Once all the eggs are halved and the yolks removed, use a fork to mash up the yolks. Add the mayonnaise, mustard, vinegar, salt and pepper(optional).
  3. At this point, taste your mixture and make any adjustments to suit your preferences.
  4. Spoon mixture into the hollowed out eggs whites and garnish as desired (see suggestions below!).
Recipe Notes

Keep covered and chilled until serving. Keeps 3 to 5 days, covered, in fridge.

Plan to cook 2 more eggs than you need. The extra yolks will ensure you have ample filling and you can save the whites and use them later in a salad (or just eat them as a snack!).

Basic Mayonnaise Recipe Link

GARNISH IDEAS - Let your imagination run wild! The possibilities are endless!

  • Paprika (old school standard) - regular or smoked
  • Bacon
  • Dill
  • Jalapeno
  • Radish
  • Scallion or Chives
  • Kimchi
  • Smoked Salmon

The Monday Mention – The Big Fat Surprise by Nina Teicholz

In The Big Fat Surprise, Nina Teicholz takes an in depth look into the nutrition research that has guided our way of eating for decades. The low fat/high carbohydrate diet that we, as a population, have been advised to follow for decades is not working. We are more unhealthy now than ever before. By following the science, Teicholz discovers that the foods we’ve been taught to deny ourselves – meat, cheese, butter, lard could actually be the very foods that bring us back to health. Through an exhaustive look at thousands of scientific studies and conducting countless interviews, she shows us that the diet advice we’ve been urged to follow for years is based on little more than weak science that is often manipulated to achieve the researcher’s or study funder’s desired outcome.

The Monday Mention - The Big Fat Surprise by Nina Teicholz

For decades researchers have demonized saturated fats, largely due to the fact that these fats can increase a person’s LDL cholesterol. The Framingham Study’s follow-up results showed that, of all the measurable lipids and lipoproteins, HDL cholesterol has the largest impact on cardiovascular risk (Teicholz, 2014, pg.162) and is a better predictor of heart attack than LDL. Interestingly, saturated fats are the only food known to actually increase levels of HDL cholesterol! (Teichrob, 2014, pg.334)

Another interesting fact I learned about saturated fats is that the type of LDL they increase (light, buoyant LDL) is not associated with an increase in heart attack risk. In fact, it is the small, dense type of LDL that has been shown to be linked to increased heart disease. An increase in this type of LDL is seen in diets higher in carbohydrates.

Sure, we have finally been told that trans fats are unhealthy. What should have been a boon to our society’s health with the banning of these trans fats though, has led to the creation of more “Franken-fats” in the form of interesterification, genetically modified soybeans and “fat” replacers. Industry continues to mess with nature and the chemistry of fats to solve a problem that didn’t exist 100 years ago when we ate the fat provided to us by nature. Once again, the public is being used, unwittingly, as guinea pigs in these experiments where the health implications are unknown. Companies and chemists have gone to so much work to replace saturated fats and at what cost? It’s apparent through reading this book, that the cost has been the health of a great many people. This cost will only continue to escalate unless we can break the stigma surrounding saturated fat. Teicholz’s book sheds light on this and I found that it highlights the evidence surrounding what Nutritional Therapy Practitioners tell their clients – that good quality, well sourced fats are vital to optimal nutrition and health.

I must admit, I found the first part of this book to be a bit dry and hard to get through. Perhaps it is because I have already read a fair bit about Ancel Keys and his infamous “Seven Countries Study”. If you have never heard of Ancel Keys, I urge you to look into him. Long story short, the results of his “Seven Countries Study” confirmed (in his warped sense of research) the relationship of saturated fat consumption to increased heart disease. But (and this is a BIG BUT), it turns out that the devilish Mr. Keys cherry picked only the countries that, when graphed, appeared to prove his hypothesis. Once ALL the countries are graphed, his correlation falls apart. It is this flawed methodology that has dictated what we’ve been told to eat for the last half a century! So, although it takes a bit of effort to push through all the review of the studies, it really is worth your while. I enjoyed the second half of the book much more, particularly the information about cholesterol.

The big takeaway I have from this book is just how infuriating and frightening it is to realize how research outcomes are manipulated, ignored or coerced through funding. People’s egos and company bottom lines have affected the health of millions for several generations. I do think that we are making some progress. The horrible effects of sugar are known to a lot more people today than even a few years ago, but the benefits of saturated fats have yet to hit the mainstream population. The information IS out there, but only if you choose to seek it out. People who aren’t passionate about nutrition and health still rely on the guidelines based on weak science. Nutritional Therapy Practitioners have our work cut out for us to try and shift this school of thought, but I believe that as more of us share our knowledge, others will be empowered to question the advice they have been given for decades.

Rating 4 Peaks
My Rating – 4 out of 5 Peaks

REFERENCES

  1. Teicholz, N. (2014). The Big Fat Surprise. Simon and Schuster Paperbacks.

Cinco de MAYO…..nnaise

Jump to Recipe
Homemade Avocado Oil Mayo

I know, I know..a mayonnaise recipe to celebrate Mexican independence is an odd choice, but really EVERY day is a good day to celebrate this easy(I mean, ridiculously easy)condiment recipe. It’s chock full of healthy fats and missing all the gunk found in most store bought brands. I also use this mayo as a base for a coleslaw dressing that I serve with carnitas…so there is a bit of a Mexican link after all!

Making your own mayo can seem daunting when you read recipes telling you that you must drizzle the oil in slowly, all while whisking like madman or your mayo won’t come together and you’ll be left with a soupy, oily mess. I can barely pat my head and rub my tummy at the same time, so this all sounds like a disaster in the making.

Enter the immersion blender… with this nifty tool, you can have easy, no fuss, no mess mayo in seconds. And, it’s a pretty cool party trick to boot! I have heard that high speed blenders and mixers can also be used  – but I have never tried it this way. If you get successful mayo from either of these methods, let me know in the comments!

So what is mayo? Mayo is an emulsion – or a mixture of two things that can’t normally be combined (like oil and water). This coming together of two different worlds requires the use of an emulsifier to keep them from separating. In mayonnaise, egg yolks play this role. Yolks contain lecithin, a fat emulsifier, which keeps the oil in tiny little droplets and prevents them from collecting into larger drops that will separate out of the mixture. The mustard also helps out as an emulsifier in this recipe. You can opt to leave it out, but I use to add a bit more stability and some extra zip to the flavour.

Avocado or olive oil are two healthy fats that can be easily whipped up into a delicious mayo. You want to avoid vegetable oils, not just in mayo-making, but in general. Oils, such as canola, corn and soy are generally highly processed and damaged during manufacturing, are often “deodorized” and bleached to hide signs of rancidity and can cause oxidative damage and inflammation. Yuck, no thank you!

I opt for avocado oil, as I find it has a more neutral flavour than olive oil. There are some decent avocado oil and olive oil mayos on the market. If you can find one that you like that doesn’t have any unnecessary ingredients in it, by all means, feel free! I’ve found that I much prefer the flavour of my homemade version!

Once you have the basic mayo down, you can add all sorts of extras to create a variety of dressings and spreads. I put a few of my faves in the recipe comments, but let me know what fun variations you come up with!

Now…on with the MAYO!

Print Recipe
Mayonnaise
A quick and easy recipe for a healthier version of this versatile condiment!
Cook Time 5
Servings
cup
Ingredients
Cook Time 5
Servings
cup
Ingredients
Instructions
  1. Make sure to test that your blender head will fit into the mouth of the container you choose BEFORE you add the ingredients.
  2. Crack egg into the bottom of a mason jar or high sided container.
  3. Add all other ingredients to jar.
  4. With one hand holding the jar, place head of immersion blender over the yolk of the egg and turn the blender on, keeping the blades immersed in the liquid. You will see the color start to change to the white color of mayo immediately.
  5. Slowly move the blender up and down and side to side (keeping the blades immersed) until all the ingredients are incorporated and the mixture has thickened to the consistency of mayonnaise.
  6. Taste and adjust seasoning if desired.
  7. Will keep, sealed in the refrigerator, for 3 to 5 days
Recipe Notes

Variations (per 1 cup of mayonnaise)

Garlic Aioli - Mix in 1 to 2 finely minced garlic cloves

Chipotle Mayo - Mix in a small amount of sauce from a jar of chipotles in adobo (start with 2 teaspoonfsul and work up, depending on taste). Alternately, you could add mayo to a blender with 2 chipotle peppers from the jar and blend until smooth. Add 1 teaspoon of lime juice and adjust to taste

Dilly Tartar Sauce - Mix in 1/2 a cup finely diced dill pickles, 2 teaspoons lemon juice,  1 teaspoon onion powder and a tablespoon of fresh dill