Happy Fall! I love the beginning of the autumn months, with the chilly mornings and lovely warm afternoons. By September, I’m usually ready to put the grill aside in favor of some slow braised stews or comforting soups.
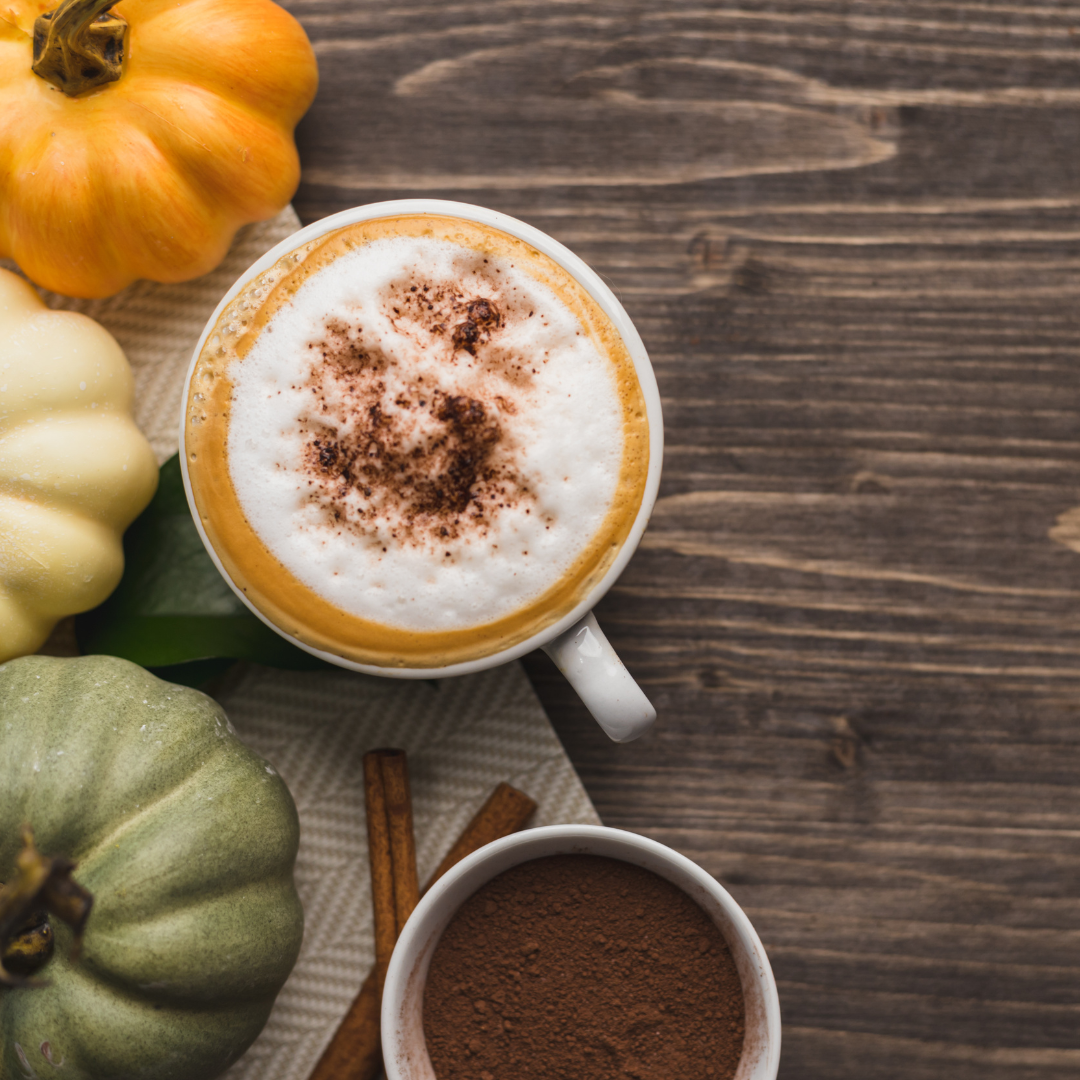
For many, the arrival of fall means just one thing…PUMPKIN SPICE SEASON!
Pumpkin spice seems to dominate everything nowadays…from lattes to candles to snack mixes (just walk into a Trader Joe’s in fall and take a gander at their pumpkin spice offerings!)
But the OG, the latte, is what we are here for! If you’ve been avoiding those Pumpkin Spice Lattes from your favorite barista…well, first of all, good for you! 👏👏👏
At 39g of sugar in just a Tall PSL, you are definitely doing yourself a favor! (That’s roughly 10 teaspoonsful of sugar in that little cup!)
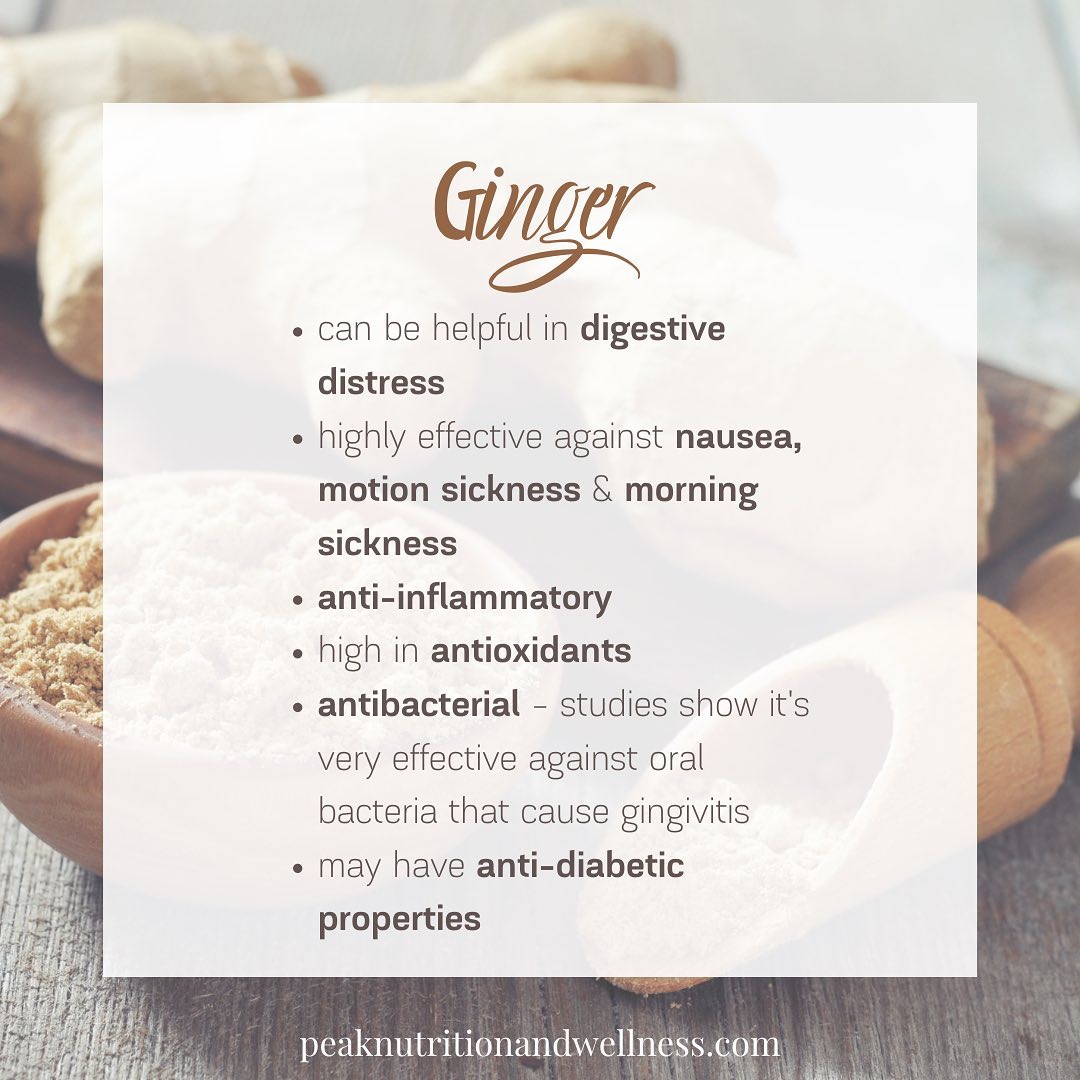
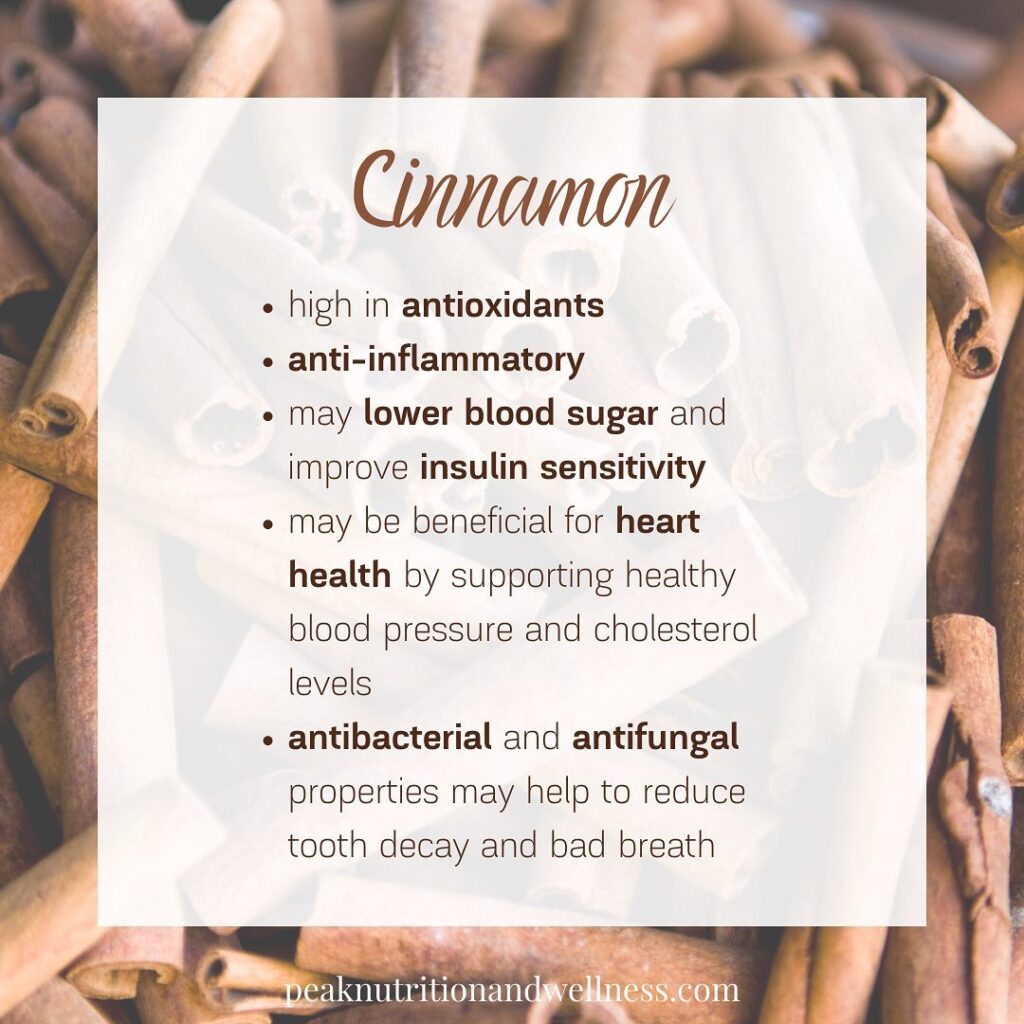
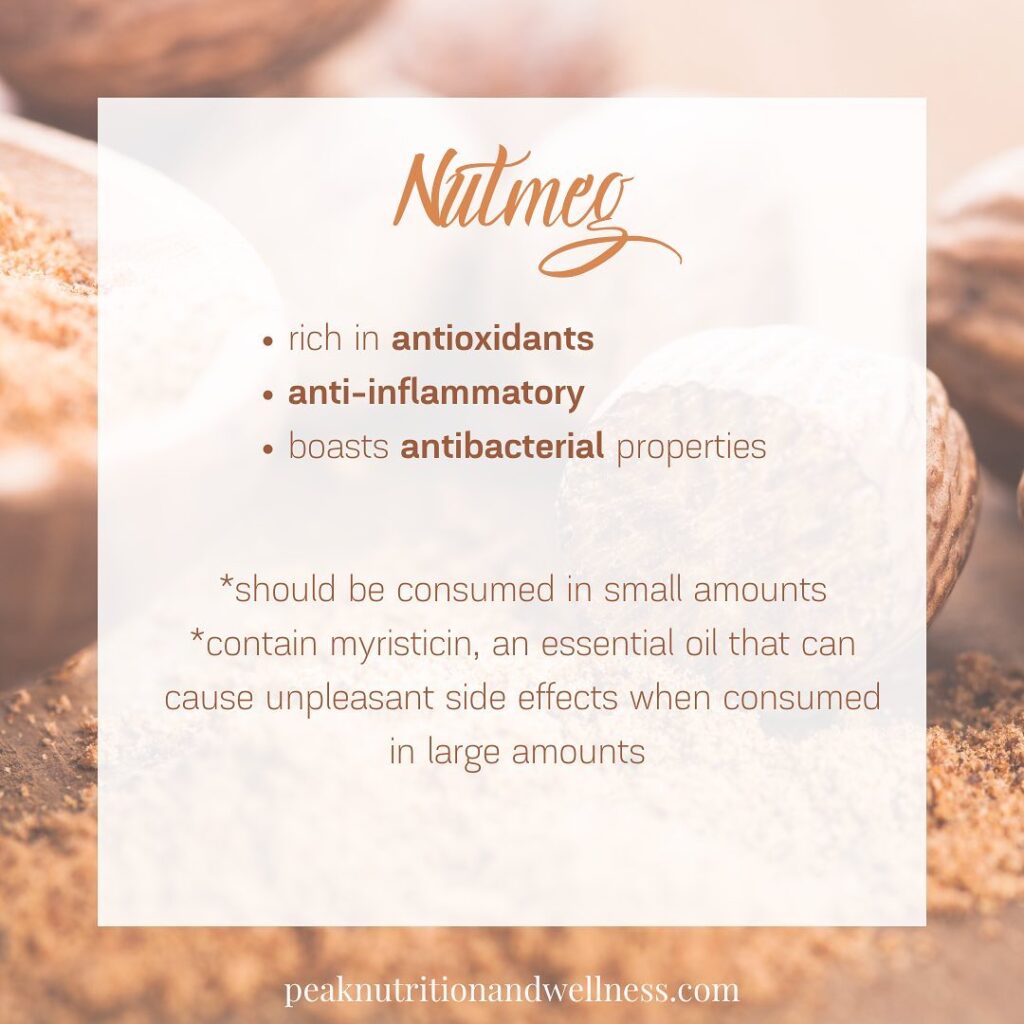
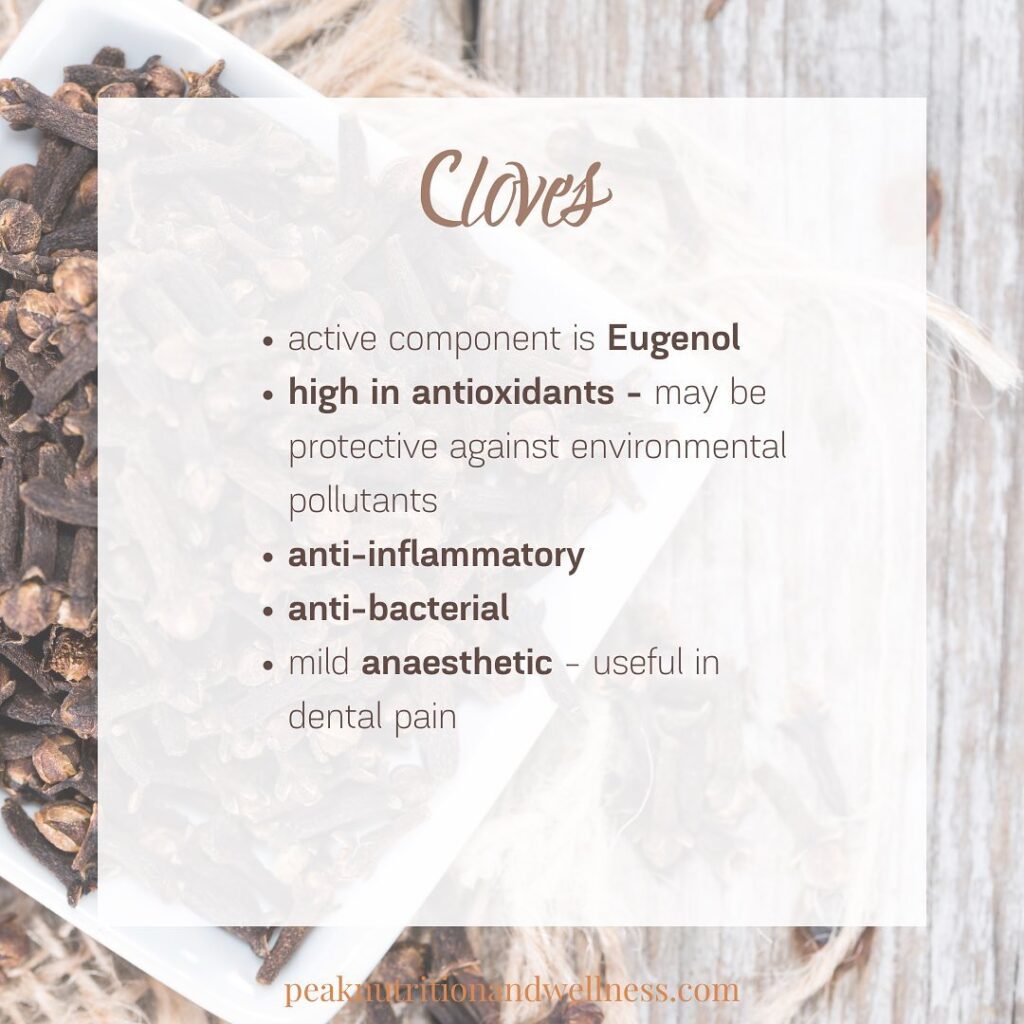
Although the sugar gives the ol’ PSL a bad rap, the spices that make up the warming pumpkin spice blend are pretty darn good for us! Check out the benefits below!
Luckily, we can still keep a little spice in our life and avoid the sugar shock by recreating a healthier version of our favorite fall beverage at home. For my healthier PSL, I use maple syrup (which yes, is still sugar, but it is unrefined. This means it still contains other nutrients). It’s also really easy to adjust the quantity, so we can enjoy a little sweetness without the sugar crash.
I also use Cashew Butter (specifically, I use addJoi’s Cashew Base) which gives the creaminess. I have no affiliation with them, I just really like their products, as they have no additives! Many dairy free milk products contain thickeners or emulsifiers which irritate the gut, affect gut health by increasing intestinal permeability and/or contribute to an overgrowth of the intestinal bacteria. I encourage you to check addJoi out!
You can choose to sub in your favorite dairy free milk alternative, but may have to adjust the strength of the coffee to get the right mix, as the extra liquid will water down the latte a bit. If you enjoy a weaker cup, it might work great for you!
Are you like me and prefer your latte iced? I think my love of iced coffee comes from my pharmacist days where I would sip from the same cold cup of coffee all shift long! To make it frosty, simply blend and pour into a glass over ice!
1tbsporganic cashew base (I use the one from addJoi)(https://addjoi.com)can substitute cashew butter
1tbsppumpkin puree
1-3tspmaple syrup
1/4 tsppumpkin spice blend(see notes for recipe)
Instructions
Add all ingredients to a blender. Whir it up until frothy and enjoy!Note: Start with 1 tsp of maple syrup, you can add more if desired or omit if you prefer a sugar free version.
Pour into mug and top with an extra sprinkle of Pumpkin Spice Blend
Notes
You can try substituting other nut butters, but I find cashew is the creamiest (less grainy) and works the best.Pumpkin Spice Blend
It’s hard to believe summer is soon coming to an end. As much as I’ll hate to see the Pacific Northwest rain clouds replace the summer sunshine, I do love autumn. The colourful leaves, crisp air on morning walks, cozy sweaters and swapping out grilled foods for some comforting, slow cooked fare – all are great reasons to embrace the change of the season!
As the weather changes outside, it’s also a great time to check in with our internal environment and how we are feeling. Tuning into our bodies and the subtle messages they send us is something most of us need to work on. Our lifestyles and responsibilities keep us focused on, and prioritizing, pretty much everything but ourselves! We take our cars in for regular inspections (or, um, we should), so we should definitely be doing regular “mileage” inspections on the state of our well-being!
Check-in With Yourself
Take a few minutes during your day. Find someplace quiet and free of distractions. Drop out of your stressed, fight and flight state by taking several slow, deep belly breaths. Now – what are you noticing? Some questions you might ask yourself are:
How’s my energy level? Are you dragging yourself through the day, fuelled on caffeine and sugar? Do you need to snack to make it through to your next meal?
How am I sleeping? Are you getting 7-8 hours of quality sleep? Do you wake up during the night and can’t fall back asleep? Do you wake up tired or refreshed?
How’s my digestion? Symptoms like heartburn, bloating, constipation, diarrhea, abdominal pains, stools that float or are light coloured, or undigested food in the stool are all warning lights that require some attention.
Am I nourished? Feeding ourselves regularly doesn’t necessarily mean we are nourishing ourselves. Relying on packaged and processed foods, hitting the drive thru on the reg and consuming foods high in sugar might fill the belly, but they aren’t fuelling your body with the nutrients it needs to work optimally.
What other things are showing up that aren’t “normal”? – Headaches? Joint Pain? Anxiety? Skin rashes? We often get so used to these type of symptoms that they become our status quo. They may be common, but they aren’t NORMAL. Symptoms are your body’s warning lights and it’s way of telling you something isn’t right!!
Now that you’ve run through your checklist, what have you discovered?
It could be you realize summer ice creams have become a daily occurrence or you completely Hulk out on anyone in your vicinity when you miss your between meal snack. Maybe you can’t remember the last time you slept through the night or perhaps the drive-thru guy knows you by name. You might realize your bathroom has become your second home or, you can’t pinpoint exactly what is wrong, but you know you just don’t feel your best. If any of these things hit home, it may be time for a RESTART®.
What is RESTART®?
The RESTART® program is a 5 week, online, group program that combines loads of nutritional education and a 3 week sugar detox. When you add in the element of group support, it’s a powerful (and fun!) combination.
Who should RESTART®?
Whether you have been dabbling in healthy eating for awhile or don’t know your kale from your kohlrabi, RESTART® is for you! It’s the perfect combination of education and action that teaches you, not only how food affects us, but lets you experience how powerful real food can be. RESTART® is great for individuals, couples or families. You can join with a friend to have an accountability buddy or make pals in class or the free Facebook group.
Since the classes are conducted via Zoom, you can join from the comfort of home, no matter where in the world you are located!
Why RESTART®?
Maybe the question should be “Why NOT RESTART®”? Let’s face it, most of us need to do a better job of putting ourselves, and our health, first. Self-care isn’t selfish! To paraphrase a quote from Katie Reed, self care allows you to give the world the best of you, instead of what’s left of you!
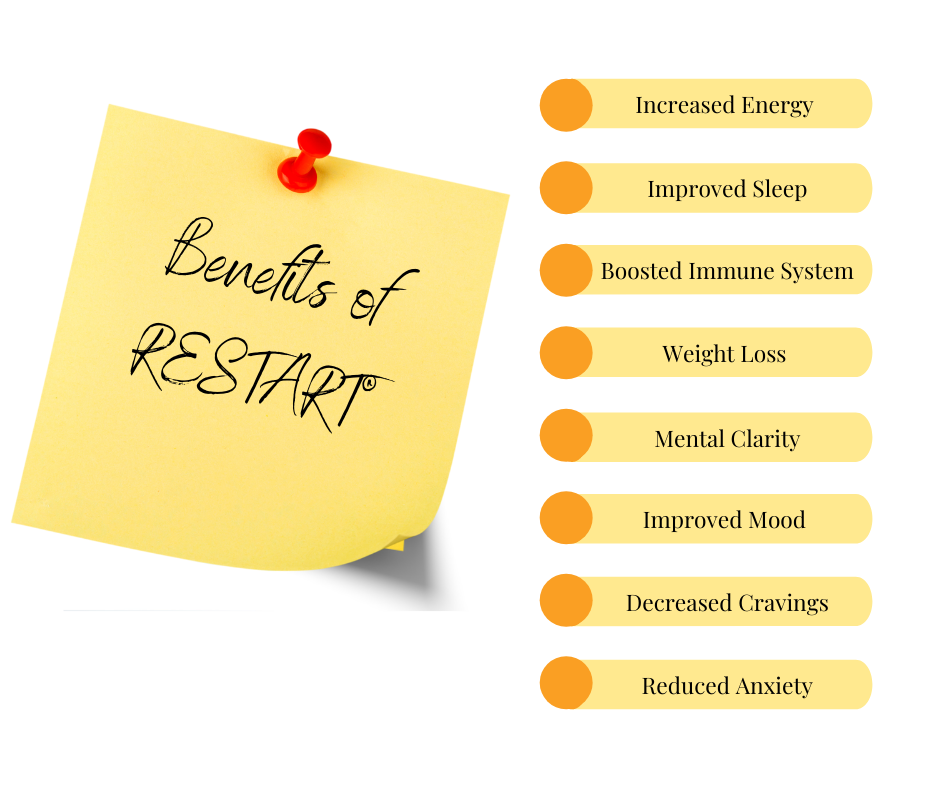
Everybody gets a little something different out of the RESTART® program. Below is a list of some of the benefits RESTART® participants have experienced.
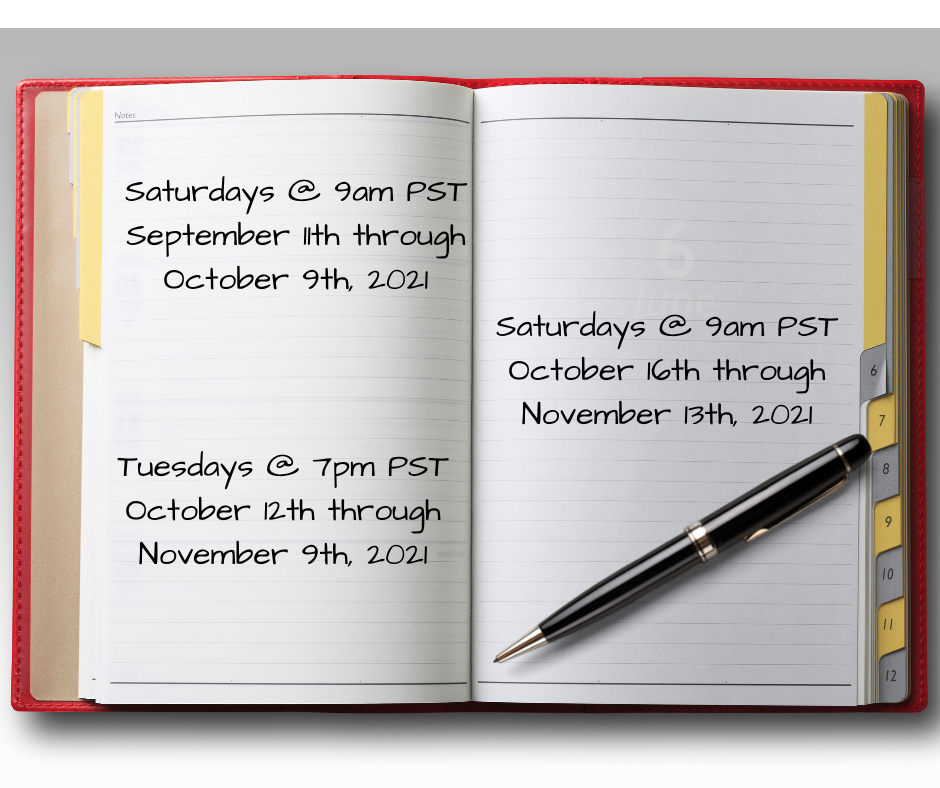
Where and When is RESTART®?
I’m super excited to be offering THREE different class times this fall! All classes are conducted live on Zoom.
How can I register for RESTART®?
If you think you could use a RESTART®, you can register for class by clicking HERE.
If you have more questions about RESTART®, visit the RESTART® page on this website or send me a message HERE. I’d love to chat with you about it!
Oh! One last thing! If you don’t see a class time that fits your schedule,contact me. I’m happy schedule additional group classes (minimum of 4 participants) at a date and time that works for everyone!
What are you waiting for? Go on! Get (RE)STARTED!!
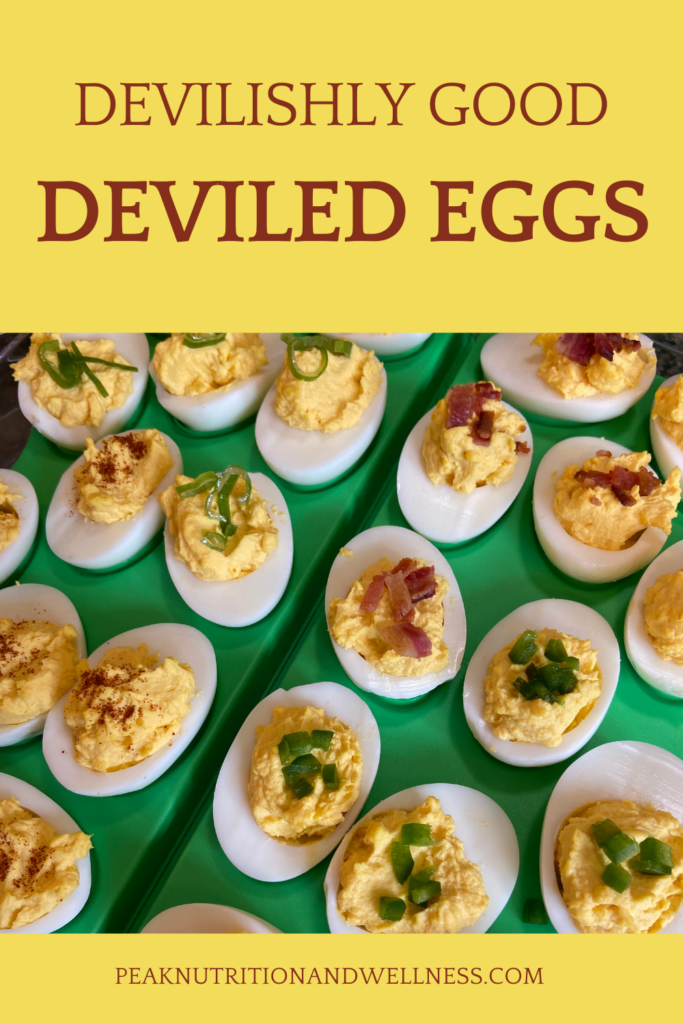
One of my clearest food memories is of my Mom’s Deviled Eggs. I can still see the yellow Tupperware container with the special “egg holding” insert that she used. I wouldn’t say she made them all that often, but usually when you saw that Tupperware container come out, you knew there was a party or holiday meal about to happen!
Mom’s eggs were DELICIOUS. A little sweet and a little tangy, thanks in part to a “miraculous” mayonnaise style condiment that was pretty popular while I was growing up. It probably STILL IS popular with a lot of folks, but with its high fructose corn syrup, fragile and damaged oil and various thickeners and fillers, it’s not something that’s invited into my grocery cart anymore.
So I knew if I wanted to relive that childhood food memory, I’d have to ditch the processed stuff and create my own version. I think they are just as tasty as the one’s I remember eating growing up. Different, but just as good. Well, maybe ALMOST as good because does anything ever taste as good as what Mom made? It’s that “the secret ingredient is love” thing. Pretty sure.
The funny thing about deviled eggs is that they are one of the few foods that really don’t smell all that great (they ARE kinda stinky), but almost everyone loves when they show up at a get together! I’ve taken them to numerous shindigs (they are a great potluck item for those of us avoiding gluten or dairy). When I arrive, I uncover the deviled beauties while sheepishly mumbling an apology for the odor, only to be cut off with excited exclamations by fellow party goers! “Oooo deviled eggs! I haven’t had those in ages!” “Wow! I love these things! I never make them because they are so much work!”
Truth? They are REALLY easy to make. Yeah, they take a bit more effort than grabbing a veggie tray from the supermarket (which there is nothing wrong with, by the way), but they definitely give the impression you put a lot more work in than you did. That’s never a bad thing.
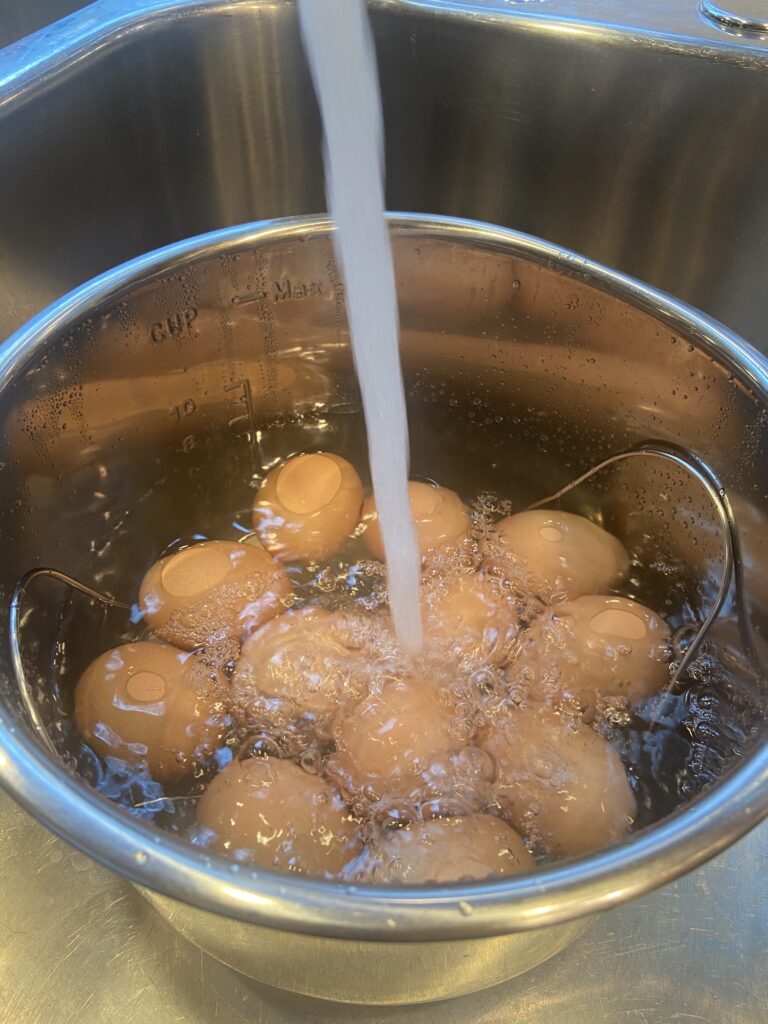
The hardest part of making deviled eggs is getting hard boiled eggs that you can peel easily. There’s not much worse than trying to peel an egg and ending up with something that looks like the dog chewed on it, full of gouges and holes. I’ve found that the Instant Pot makes perfectly peelable eggs EVERYTIME! Feel free to go old school on the stove top, if that’s your style. I have read that fresh eggs don’t peel as easily as older eggs. I’ve never had an issue with the Instant Pot, but if you are boiling on the stove top, maybe buy your eggs a week or so ahead of time.
Alright – enough chit chat! Let’s get to the good stuff! How to make these wickedly good little things!
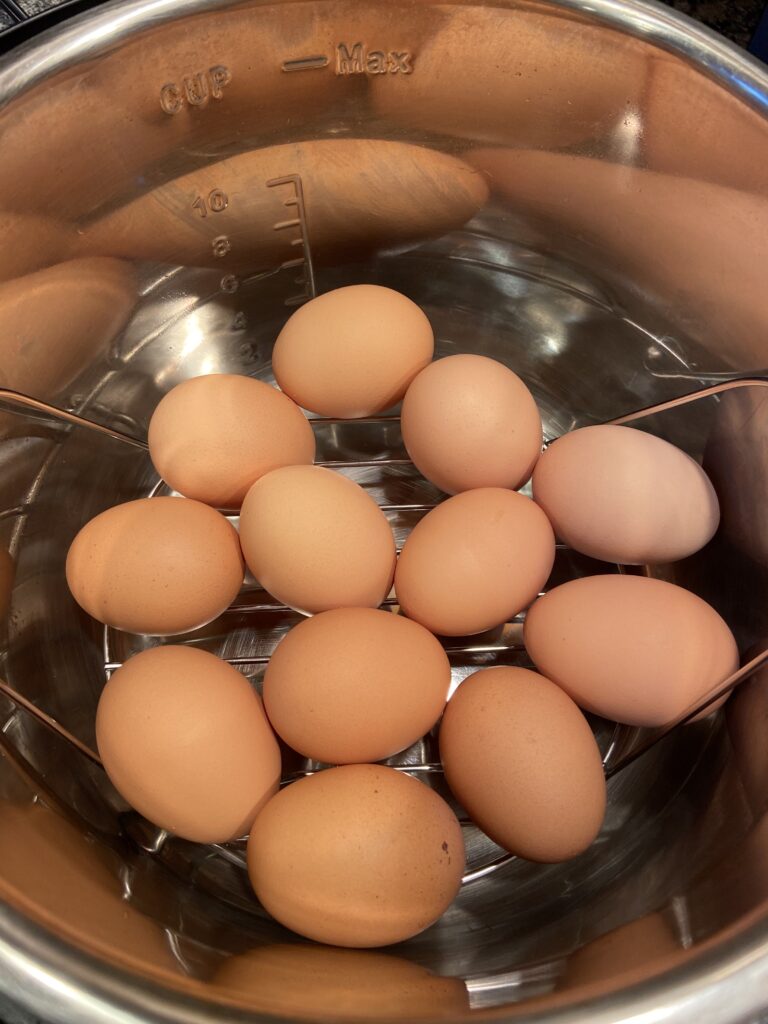
First step is to boil (or pressure steam) those eggs. I’m going to run with the Instant Pot instructions here, but I have included stove top directions in the recipe card.
Place your eggs in a single layer on the trivet (rack) of your Instant Pot.
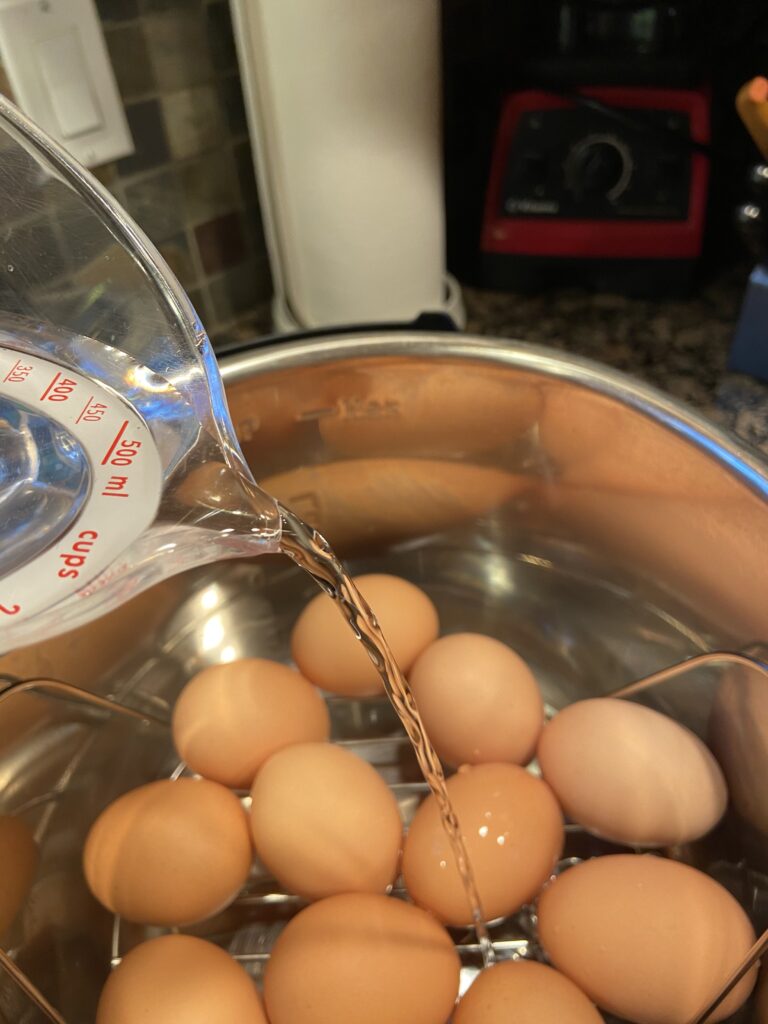
Add 1 cup of cold water to the pot. Place and lock the lid onto the instant pot.
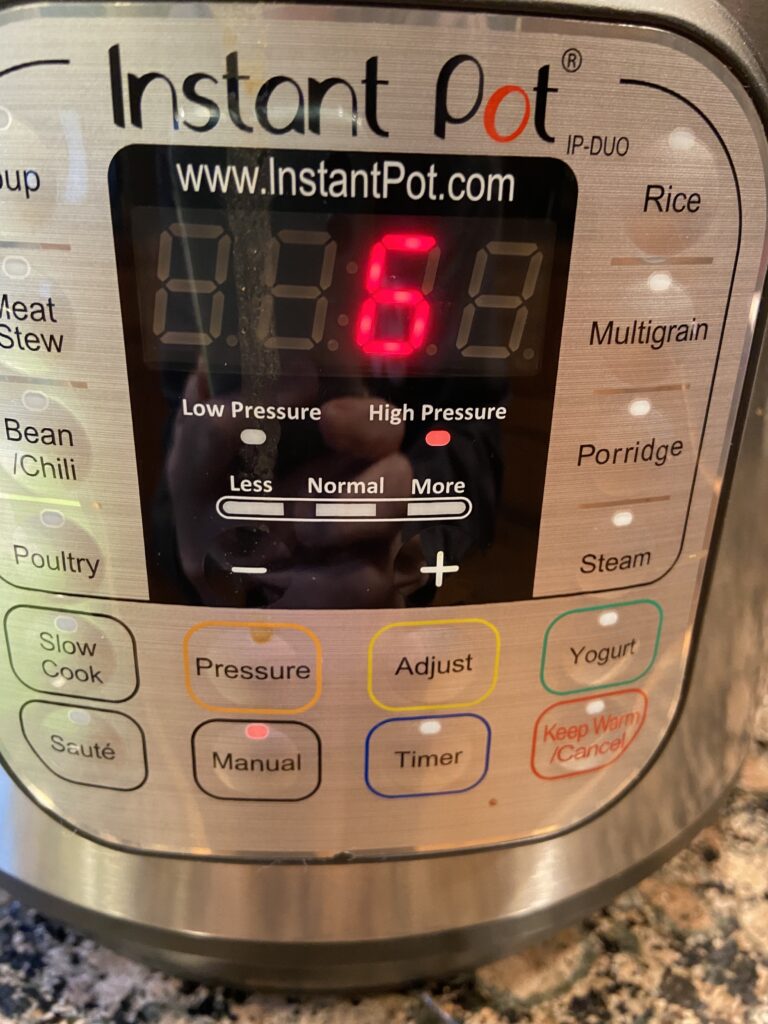
Ensure that the venting dial is set to SEALING and set the timer to 6 minutes under HIGH pressure.
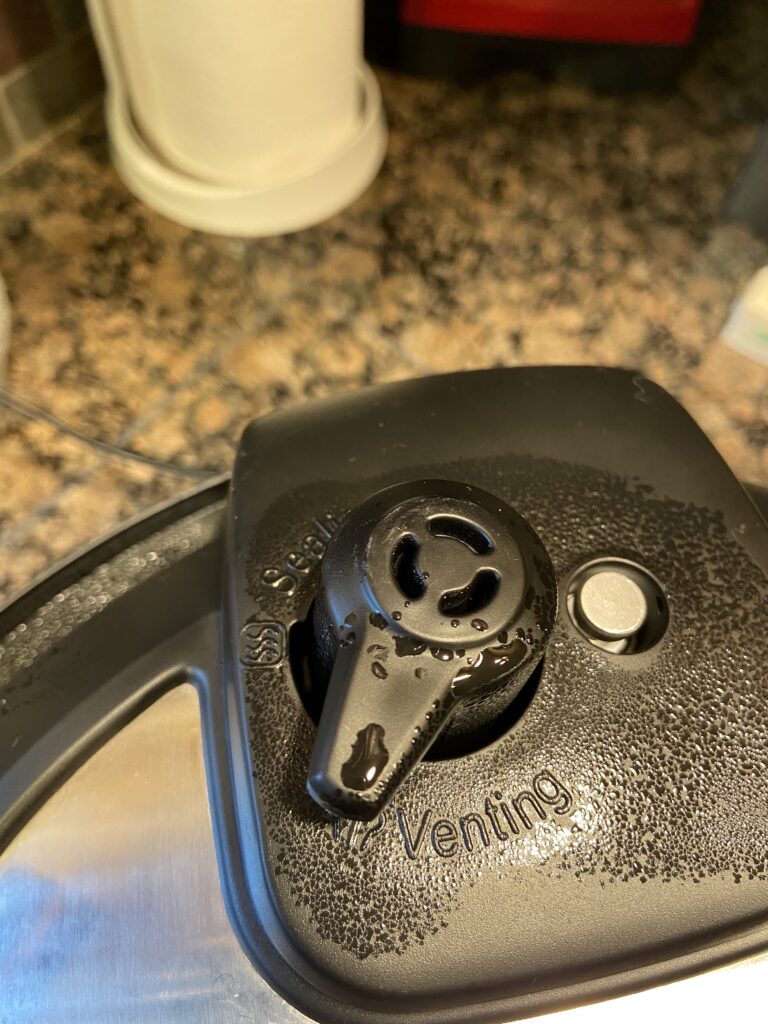
When the timer goes off, immediately turn the venting dial to VENTING, making sure to avoid the high pressure steam that will be released. Once the pressure has lowered enough so that the lid unlocks, you can either remove the eggs to an ice bath or take the lazy person’s way (like me) and use pot holders to lift the stainless steel insert out of the Instant Pot and run cold water over the eggs. Allow the eggs to sit in the ice bath or cool water for about 10 minutes.
This would be a great time to make your mayonnaise. Click HERE to get my quick, easy and healthy Mayonnaise Recipe. You can use a store bought Avocado Oil or Olive Oil Mayo (just make sure to read those labels carefully!), but avoid any with hydrogenated or partially hydrogenated oils. Damaged, unhealthy fats make damaged, unhealthy bodies!!
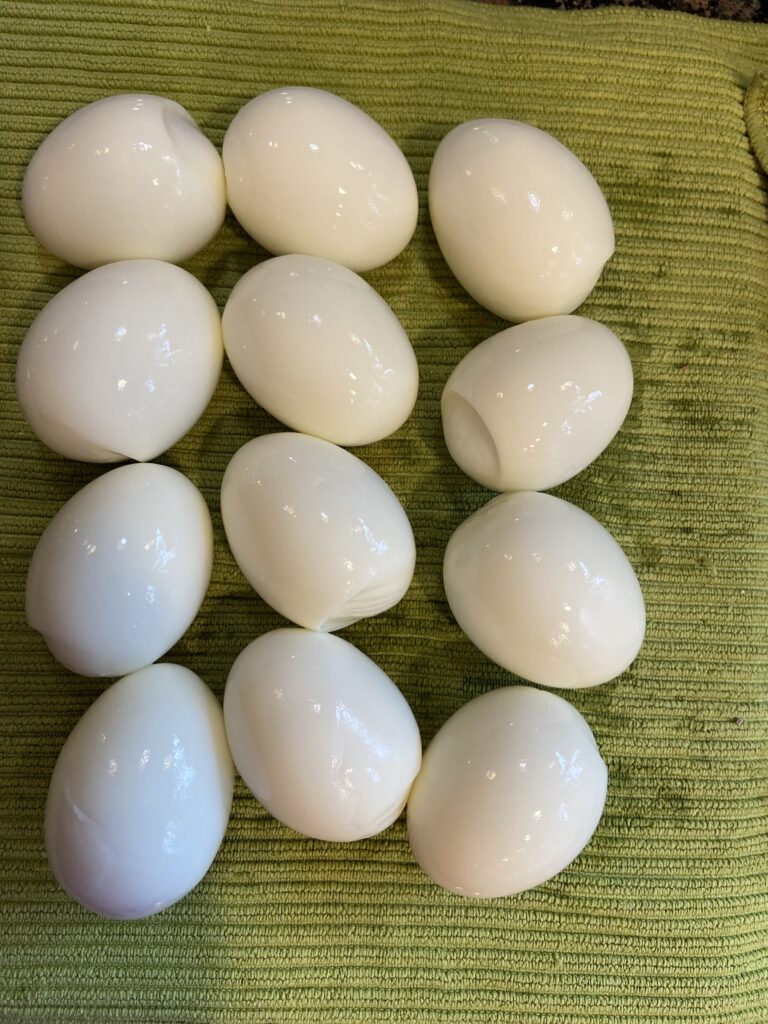
Now the fun part! Peel those eggs! It is really SO easy with Instant Pot eggs – total game changer.
Once the eggs are peeled, slice each egg in half lengthwise and spoon out the yolks into a separate bowl. Set the whites aside for filling later. (Pro tip from my Mom…cook a couple more eggs than you need and use their yolks in the filling. This gives you a little extra filling to go around. Nobody likes skimpy deviled eggs! You can keep the whites to use in salads etc.)
Mash the yolks up with a fork and then add the mayo, mustard, apple cider vinegar, salt and pepper (if using). The measurements I give in the recipe are to my taste. I’d advise that, instead of dumping everything in, add the ingredients separately (even a bit at a time) mixing well in between and taste as you go. Depending on your own palate, how big your yolks are and even how thick your mayo turned out, you may want to adjust quantities a bit.
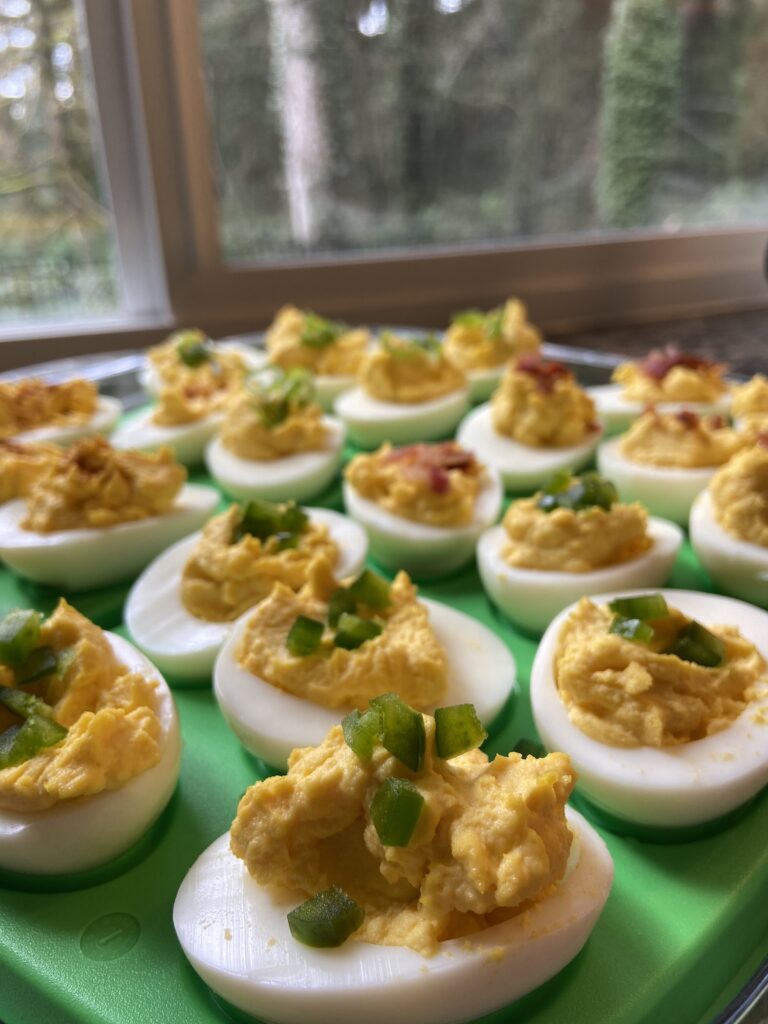
Once you’ve got the filling mixed so it’s smooth, fluffy and tasting great, spoon the mixture back into the yolk divots in the whites you set aside. You can get fancy and use a piping bag, but spooning it in with a teaspoon is quicker, easier and you don’t lose a whole bunch of your delicious filling on the sides of the bag.
Once filled, let your creativity flow and garnish those bad boys with whatever floats your boat. Bacon, chives, scallions, dill, jalapeño, smoked salmon, paprika, kimchi(pat it dry first!)… the options are endless.
Chill until serving. Keeps well, covered, in the fridge for 3 to 5 days. Enjoy! Let me know what topping you like on your devilled eggs in the comments!
If you want to find out more about the incredible, edible egg, check out my previous TRILOGY of posts on eggs!
Part 1 – What Do All Those Labels on Egg Cartons Really Mean?
Part 2 – Common Myths and Misconceptions about Eggs
Perfect for picnics and BBQs, game day feasts or potlucks, these little devils are quick and easy to prepare, free of processed ingredients and full of protein and healthy fats. A true crowd pleaser!
1/4teaspoonfulpepperoptional (can use black OR white pepper)
Instructions
Hard Boiling the Eggs (Instant Pot)
Place the eggs in a single layer on the trivet in your Instant Pot.
Add 1 cup of cold water to bottom of pot and place and lock lid. Make sure that the steam release valve on the lid is set to "SEALING".
Turn the Instant Pot on and set it to cook under High Pressure for 6 minutes.
As soon as the eggs have finished cooking, immediately release the pressure by turning the steam release valve to the "VENTING" position. (WARNING! Pressurized steam is HOT! Keep clear of the valve until pressure has released! You may also want to make sure your instant pot isn't directly under cabinetry so the steam does not damage the wood).
Once the pressure releases to the point that the lid unlocks, carefully remove lid. Use tongs to transfer the eggs from the Instant Pot to an ice bath. Alternatively, you can remove stainless steel insert (using pot holders), place it in sink and run cold water over the eggs. Once cooled (about 10 minutes), you can store them in the fridge for about a week or, peel and use them immediately.
Hard Boiling the Eggs (Stove Top Version)
Place the eggs in the saucepan in single layer and cover with cold water. The water should cover the eggs by at least an inch.
Set burner to medium high heat and bring to a boil.
Once the water reached the boil, cover and remove from heat.
Let stand for 10 minutes.
Drain and cool in an ice bath for approximately 10 minutes. Alternatively, you can place pot in sink and run cold water over the eggs. Once cooled, you can store them in the fridge for about a week or, peel and use them immediately.
Devilled Eggs
Peel eggs and slice them in half lengthwise, dropping the cooked yolks into a small bowl and reserving the cooked whites to fill later.
Once all the eggs are halved and the yolks removed, use a fork to mash up the yolks. Add the mayonnaise, mustard, vinegar, salt and pepper(optional).
At this point, taste your mixture and make any adjustments to suit your preferences.
Spoon mixture into the hollowed out eggs whites and garnish as desired (see suggestions below!).
Recipe Notes
Keep covered and chilled until serving. Keeps 3 to 5 days, covered, in fridge.
Plan to cook 2 more eggs than you need. The extra yolks will ensure you have ample filling and you can save the whites and use them later in a salad (or just eat them as a snack!).
Okay, I know it’s TECHNICALLY not Autumn yet – in fact, we’ve had a bit of a heat wave here in the PNW. But, September gets me thinking about all those great autumn flavours – cinnamon, ginger, apples..YUM! And heck, if Starbucks can start selling Pumpkin Spice Lattes before summer is over, we can make muffins! At 50 grams of sugar for a GRANDE latte, my muffins are a lot better for you too!
The inspiration for these, ironically enough, came from a recipe I was trying for a RESTART™ class that I teach. It is a 5 week nutritional education program that I teach to groups (for more info click HERE). It includes a 3 week “sugar detox”, so I was trying a muffin recipe that had NO added sugar. When my husband taste tested one, he said “with a little honey or maple syrup these would be really good!”(insert eye roll here – totally missing the point hon!). But an idea was born!
While definitely not appropriate if you are doing the sugar detox portion of the RESTART™ program. Afterwards, they are certainly something that could be enjoyed once in awhile (maybe even paired with a nice frittata for a balanced breakfast!)
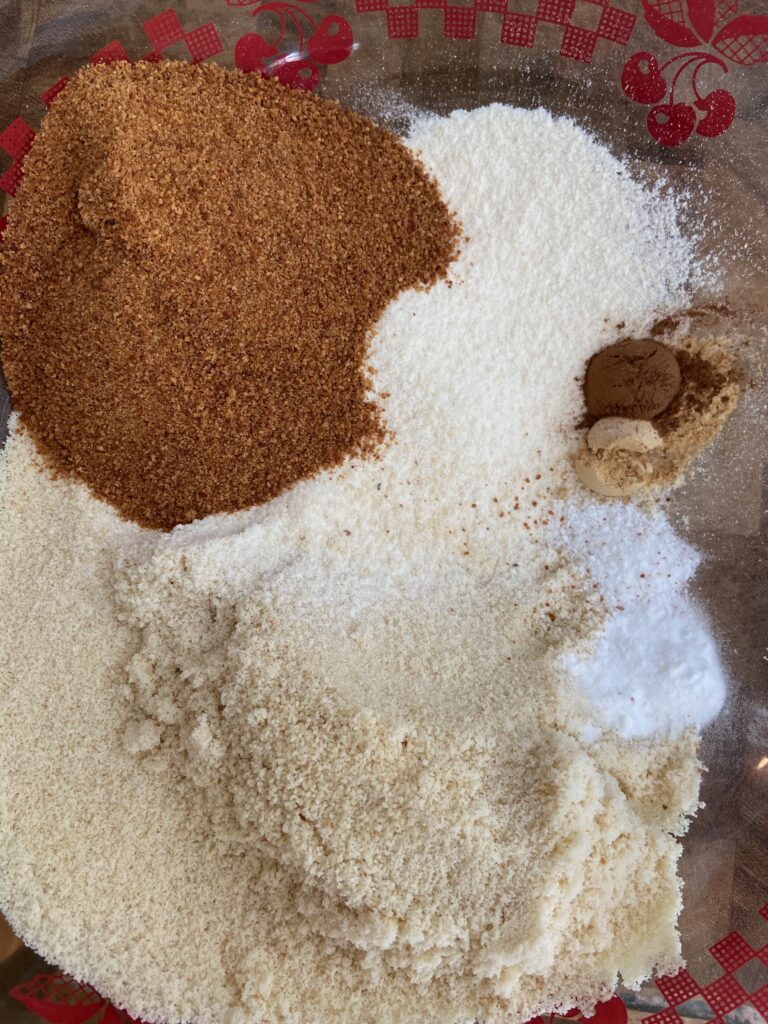
I decided to use coconut sugar as the sweetener (instead of the honey or maple syrup suggested by the hubs) because I like the “brown sugary” flavour it imparts. If you want to use honey or maple syrup, you would have to decrease the amount both sweetener and liquid in the recipe. (Check back for recipe updates once I try this myself!)
Back to the coconut sugar…why not just use brown sugar? Although coconut sugar is STILL sugar, it does have some benefits over regular white or brown sugar. Coconut sugar is much less refined than regular sugar and hasn’t been stripped of all its nutrients. It contains small amounts of minerals like iron, zinc, potassium and calcium, antioxidants and inulin (a fibre that is beneficial for gut health). Granted, the amounts of these nutrients is very small, but it’s better than refined sugar which is completely stripped of ALL nutrients! Another benefit of coconut sugar is that it has a lower glycemic index than its highly refined counterpart. The Glycemic Index of a food indicates how much and how quickly a food raises blood glucose levels. Coconut sugar, having a lower glycemic index than regular sugar, raises blood glucose less quickly and doesn’t cause as much of a “spike” in blood glucose. This makes it less stressful on the body. All that said – sugar IS sugar and even “healthy” sugars can cause inflammation and/or trigger those sugar cravings. So while I still suggest limiting sugar consumption, if you are going to have it – you should definitely consider the less refined options!
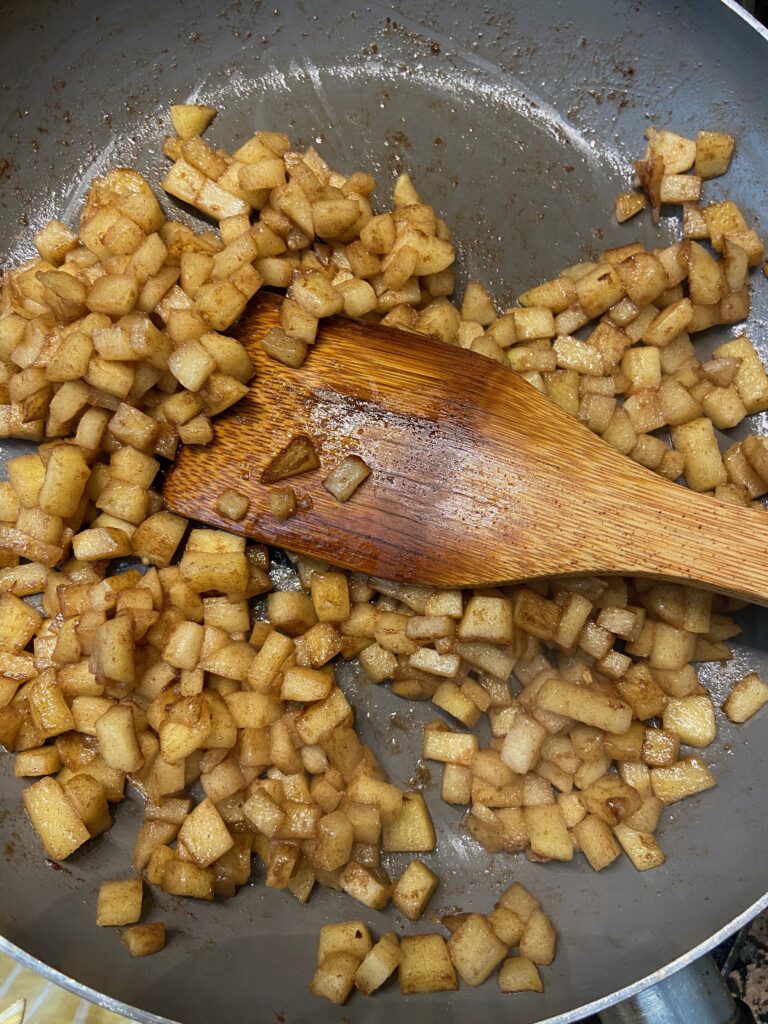
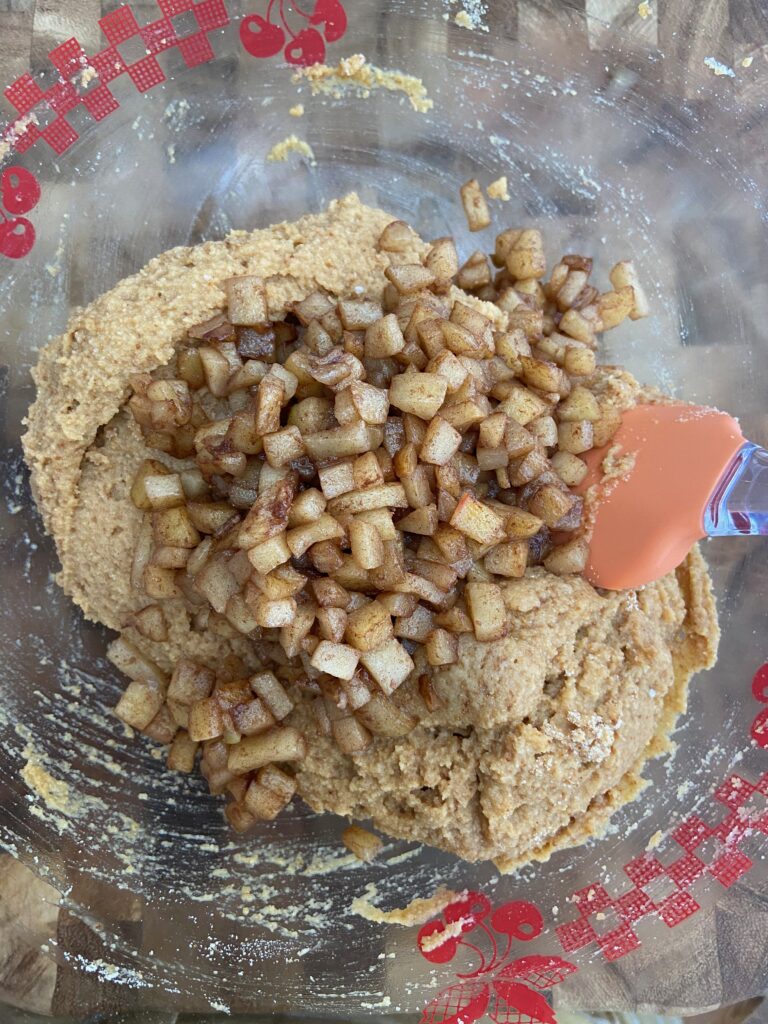
The recipe comes together pretty quickly. I started by sautéing the diced apples, cinnamon and grated ginger in the coconut oil for about 5 minutes, or until they just start to soften. (This is when the other people in the house will wander into the kitchen to see what smells so good!!)
Pull the apples off the heat and allow them to cool while you measure the dry ingredients into a large bowl. Mix well.
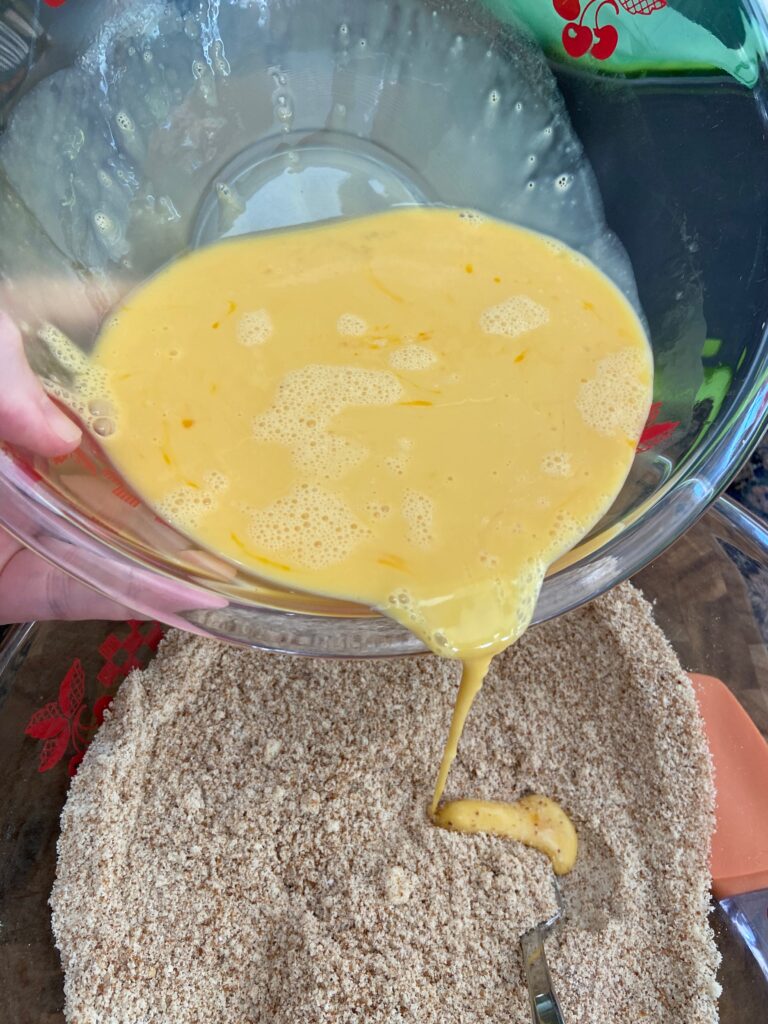
In a separate bowl, whisk together the wet ingredients (eggs, milk and vanilla).
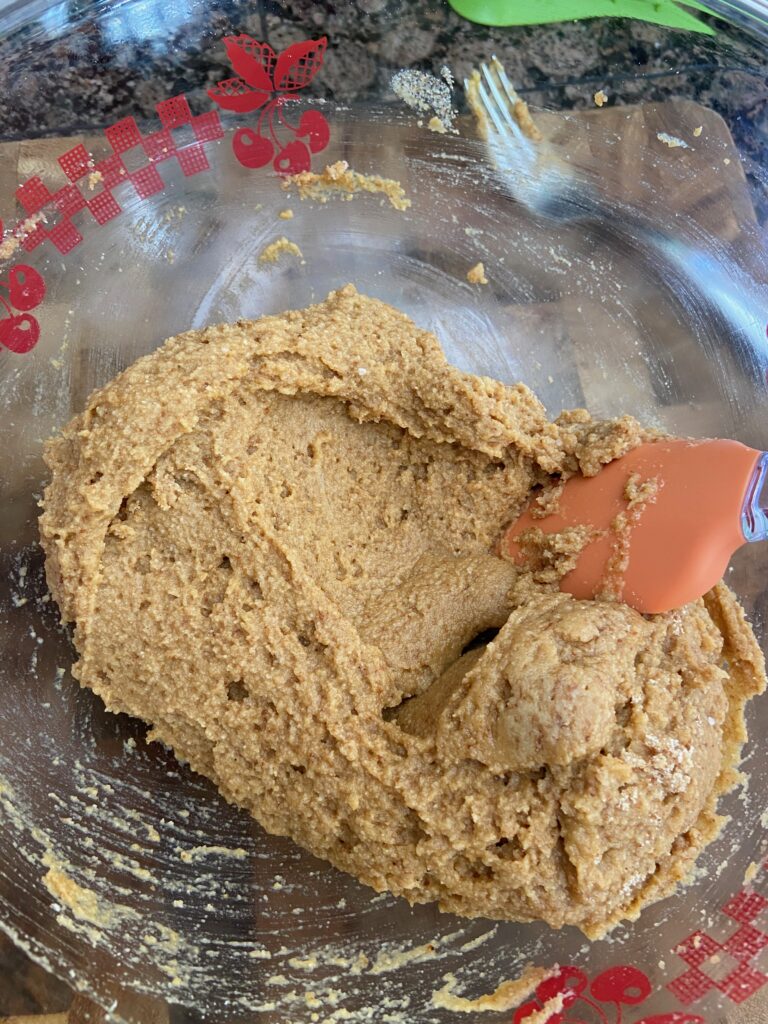
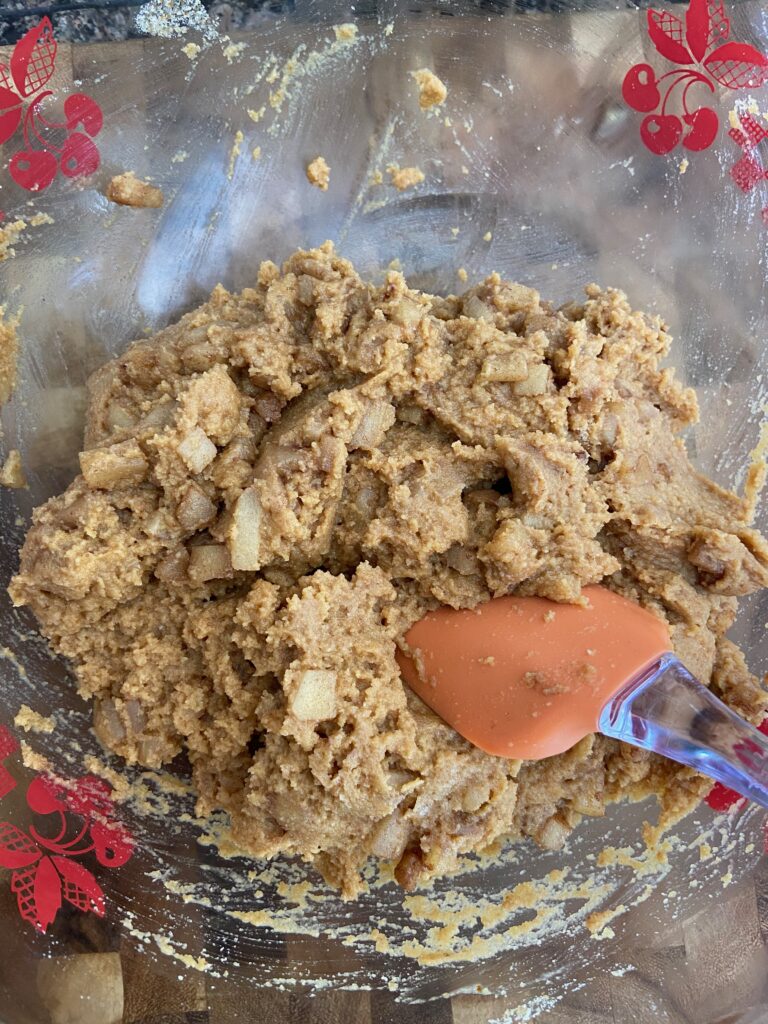
Add the wet ingredients to the dry ingredients and mix well until fully incorporated.
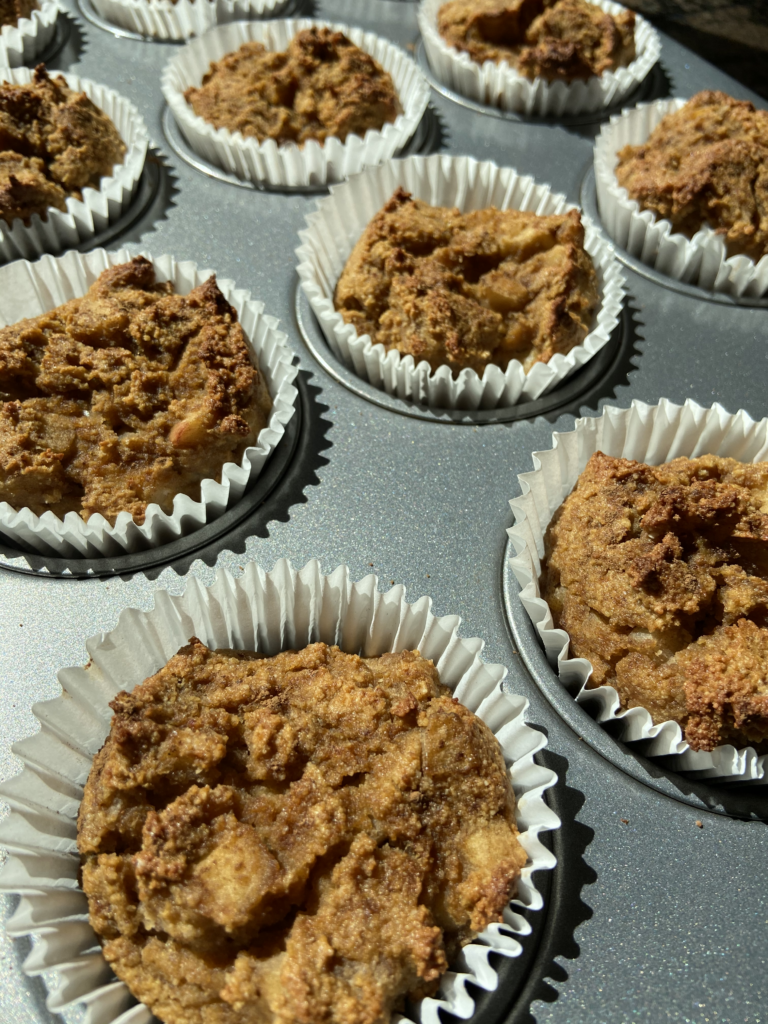
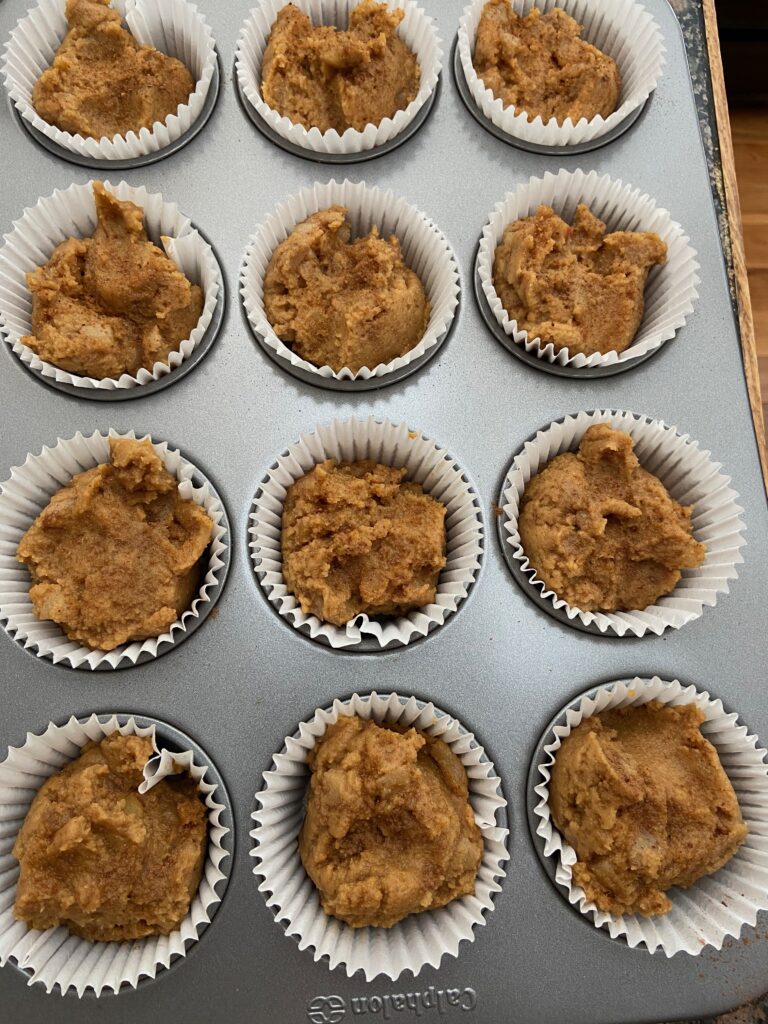
Stir in your cooled apples, measure into your muffin tin and pop in a 350 degree oven for 24 minutes (or until a toothpick inserted in the centre of a muffin comes out clean). YUM!
I think that the next time I make these muffins, I might listen to my husband’s suggestion (don’t tell him!) and try them with honey as a sweetener. Pure, raw honey has pollen, enzymes plus a variety of nutrients and is considered one of the healthiest sweeteners out there (though, remember, it is STILL sugar!). I’d also up the spice game, I like a SPICY muffin – so a little more of everything for me please!
Finally, a note on the apples. Feel free to use whatever variety of apple you like. I actually used 1 Granny Smith and 1 Gala for this recipe, but I found that the Gala didn’t stand up as well and it kind of just melted into the muffin. The Granny Smith are a bit firmer and a little more tart, so they add a nice balance to the sweetness of the muffin.
Happy Baking! If you try them, leave a comment and let me know what you think!
Print Recipe
Autumn Spiced Apple Muffins
A gluten and dairy free recipe using apples, cinnamon and ginger to give these muffins a warm, autumn flavour.
Preheat oven to 350 degrees F and line muffin tin with parchments squares or muffin cups.
Peel, core and dice apples; grate ginger if using fresh (see notes).
Melt coconut oil in saute pan, over medium heat; add apples, cinnamon (1 tsp) and grated ginger. Saute until just softened, about 5 minutes.
Remove from heat and move onto Muffin instructions.
Muffin Preparation
Measure dry ingredients into large mixing bowl and stir until combined.
Measure wet ingredients into a medium sized mixing bowl and whisk until combined.
Add wet ingredients to the dry ingredients and mix well, ensuring that all dry ingredients are incorporated.
Add cooled apple mixture to muffin batter and mix to combine.
Spoon muffin mixture into prepared muffin tin, filling cups about 3/4 full (~1/3 cup mixture per muffin).
Place filled muffin tin in preheated oven and bake for 24 minutes or until a toothpick inserted in the centre of a muffin comes out clean.
Cool on wire rack before storing.
Recipe Notes
Store for 3-5 days in fridge. Store in freezer for 3 months.
Freezing your fresh ginger root and then grating it on a microplane is much easier than grating fresh unfrozen ginger. If ginger is organic, feel free to zest the skin as well.